Showing posts with label Healthy Snacks for Kids. Show all posts

Saturday, September 17, 2011

Healthy Wheat Flattened Rice Bhel | Healthy Recipes for Diet | Step by Step Recipe

Next in the "No Fasting No Feasting" Diet Plan series, is this healthy Bhel that makes up for those hungry times in between meals. This is almost no oil in this healthy snack as I used just about 1/2 tsp of Olive oil. Surprise part of this Bhel is the fact that my kids loved this so much that, there wasn't much left for the adults at home.

Couple of days back when I was talking to my dietitian, she said she made this healthy Bhel. I wanted to try it right away but came around doing it this morning. She made with regular wheat, and was not sure if Samba Godhuma will behave the same way. I still have the most of the packet left, after making the Godhuma Halwa. I was planning to make the halwa again, but another alternate healthy recipe surely appeals more.

Other than the wheatgrain, rest of the ingredients are readily available in your pantry. You can just about improvise on this recipe and add whatever you want, just use your imagination.

This is suitable for Diabetics, you need not add peanuts to make sure it fits well.


Wheat Beaten Rice Healthy Bhel
Ingredients Needed:

Wheat - 1 cup
Beaten Rice / Thick Poha - 1 cup
Roasted Channa Dal / Dalia - 1/2 cup
Roasted Peanuts - 1/4

Seasoning:

Olive Oil - 1/2 tsp
Salt to taste
Curry leaves - few
Green Chilies - 2 medium
Red Chili powder - 1/2 tsp

How to make the Wheat Poha Bhel:

Heat a kadai, when it's hot add the wheat, keep tossing around. The thin hard wheat will expand or get bloated when it's cooked. Keep stirring for couple of minutes, remove to a plate.

Use the thick poha, next add the poha to the hot pan, keep stirring again. Cook for couple of minutes until the poha is lightly browned. Remove to the plate.

Then in the same pan, slightly toss the roasted channa dal, followed by roasted peanuts. Remove to the plate.

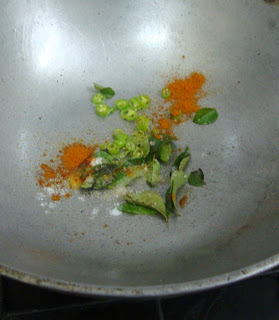
In the same pan, add olive oil, finely chopped green chilies, red chili powder, curry leaves. Toss well, then added the cooked grains. Toss everything well so that the spice powder gets mixed well with the grains.


Notes: For the kids, remove the green chilies, curry leaves and serve.

This makes a healthy bhel that you can snack anytime you feel hungry.

Sending this for Kid's Delight Party as this makes a wonderful starter, which is also healthy.

Wednesday, August 31, 2011

Sweet Corn Butter Chat in Microwave | Easy and Quick Snack for Kids

Konda and Chinnu love corns in all forms. Be it the Indian version or the Sweet corn dishes. I found that Konda especially loves this Chaat made with Sweet Corn. Recently when we had taken her for dinner at a restaurant, she only eat this sweet corn chat most than the other dishes that were on the buffet. She was going oo, aa over such a simple dish that I had to make it back home for her more often.

When I took for vegetable shopping last week, the first thing that she picked up was this pack of corn nibbles. She said I should be getting her this every week. When I made it for them over the weekend, it disappeared before I could even say anything. I just tasted one, imagine just one. They skipped their lunch for this.

Making this in microwave is very quick and easy.


Microwave Sweet Corn Chat:

Sweet Corn kernels - 1 pack
Chat Masala - 1 tsp
Butter - 1 tsp
Salt to taste

How to make Sweet Corn Chat

Wash the corn kernels. In a microwave safe bowl, take the corns, add water just enough to cover it completely. Microwave for 6 -7 mins.

Drain the water, add the chat masala, salt, butter to the cooked corns. Mix well and micro again for 1 -2 mins depending on how done the corn is.

Serve it hot.

Notes: When you are serving for adults, you can sprinkle red chili powder, garam masala, pepper powder for more spicy chat.

This goes for the MEC : Potluck Party

Enjoy and Happy Ganesh Chaturthi!

Thursday, August 4, 2011

Paneer Fingers Recipe - Low Calorie Indian Cottage Cheese Finger Fry | Easy and Quick Snack for Kids with Step by Step Recipe

It almost feels like years since I have last written here! Some thought I was on vacation, cheese far from it. I have had too many things on my plate the whole of last week and after completing the Blogging Marathon, really felt like a heavy relief. Not that I don't enjoy doing the marathon, I enjoy it immensely but the fact that it so happened that last week, I was clueless with the recipe for the theme, which made it hard. Plus the fact that I have teach the boys and get them complete their homework, seems to occupy so much time.

Well I am not complaining nor is this a rant. I simply wanted to make it clear to myself that I need to prioritize things to myself. I wouldn't want to miss spending the time with my kids. Last night when I was feeding the boys, they wanted to eat the rolled up chapattis themselves. Suddenly Peddu told me about one of their classmates. This boy brings these rolled chapatis everyday and never eats but throws it into the dustbin. Peddu told me, with his cherubic expression and a voice so sweet, that it's bad because his mummy makes these with so much efforts and this boy throws it away. Chinnu joined in saying, yes this happens daily, even the sandwich that he brings faces the same fate.

After all that talk last night, when I asked them if they will want Poori for their breakfast, they both nodded yes. Imagine my frustration when they both didn't eat a bit because of "pre departure to school syndrome" sets in! I decided never to again venture into stressful tasks in the morning. And also have a cozy talk with them.

Coming to these Paneer Fingers, these are Konda's favorite when we eat at the restaurant in the club. She will order this invariably and enjoys it so much. So I thought I must make it for her at home. In the process, I decided to make it low calorie by  pan frying it. Not for her sake but more for my own sake..:) Both Konda and Peddu enjoyed this, while Chinnu is yet to have a liking to these snacks.


Low calorie Paneer Finger Fry

For Paneer

Crumbled Paneer - 1 cup
Corn flour - 3 tsp
Red chili powder - 3/4 tsp
Salt to taste
Cumin powder - 1/2 tsp
Turmeric powder a pinch

For outer layer

All purpose flour / Maida - 3 tsp
Corn flour -1  tsp
Salt to taste
Pepper to taste
Cooking Soda a pinch
bread crumbs as required

How to make Paneer Fingers

For the stuffing:

Crumble paneer or grate it into fine powder. Add all the spice powders and corn flour. Mix into a fine mix. It will turn very soft on blending. Divide the paneer mix into small balls, shape them into fingers, keep it aside.

For the Batter:

Make a batter of flour with the other ingredients, except bread crumbs.

To make the fingers:

Dip the fingers in flour batter, roll over the bread crumbs. Pan fry in a non stick pan. Make sure it gets cooked to golden colour on all sides.
Enjoy with ketchup

You can deep fry but this low calorie fingers were also very tasty.

Thursday, July 28, 2011

Baked Masala Peanuts | How to make Oil less Masala Groundnuts with Step by Step Recipe

Couple of days back, Amma made some Masala Peanuts for Daddy's rendezvous. She told that Daddy asked specifically for these spicy masala groundnuts. Though we end up making this snack quite often at home, it is always sought after for any occasion.

I came back home to find a box full of it and after a while realized that the box was almost empty. I even skipped my dinner because of these. Anyway after making cookies non stop for four days, I thought I must do something else for the marathon. That resulted in me remembering those baked almonds. Then I remember reading a baked version at Jungalbandi. I checked their post to see the timing they used to bake these delicious treats. I knew right away what I was going to make. So I made my usual version and baked it this time.

It's surprising how easily you can adapt a recipe into a healthier version. This baked version is oil less and guilt free. I made the masala for peanuts the usual way I make. I didn't have enough time to add curry leaves or crushed garlic but had dried Mint leaves which gave a nice ting to the baked peanuts. But would surely be adding the rest I missed out, the next time I am making this.


No one believed that these were baked or oil less. Except looking little pale, these tasted just as good, maybe a bit less, but nevertheless the same in taste wise. I don't think I might again want to deep fry these masala peanuts again. Though I had called the deep fried masala peanuts as healthy snacks for kids, this will surely take the cup for being the healthier version of the masala peanuts.

Step by Step Recipe with Pictures


Baked Masala Peanuts / Masala Grounds

Ingredients Needed:

Fresh Ground nuts/ Peanuts - 1 cup
Besan / Gram flour - 1/2 cup*
Rice flour - 1 tbsp
Salt to taste
Chili powder - 1 & 1/2 tsp
Water enough to make a stiff dough
Dried Mint leaves couple of them (opt)

*This recipe may actually require more gram flour depending on how you mix it. Increase salt and spice after adjusting the taste.

How to make masala peanut in oven:

Pre heat the oven at 200C.

Wash the peanuts and let it drain.

In a bowl, besan, rice flour, dried mint leaves, salt and chili powder Mix well and remove couple of tbsp of flour mix separately. To the rest in bowl, add water slowly to a get a dripping consistency. Then add the peanuts to the bowl. Mix well, make the peanuts are coated all over.

Then sprinkle the two tbsp of flour you had kept aside and get a dry batter. Add more flour if required. It should basically be dry and not watery.

In a greased baking tray, transfer the peanuts and make sure you spread them as much as possible. When the peanuts are clinging to each other, there are chances that they don't get baked well enough.

Bake at 200C for 10 mins. Toss them around and again bake for 10 mins.

Allow it to cool. When you handle them right way, the peanuts will be soft. But once they cool down, they turn very crunchy and crisp.

I felt I should have baked for couple of minutes more when I saw couple of peanuts clinging together, and maybe that was the reason for it to be soft inside. Most of the other peanut that got baked as a single nut was very crispy.

Sending these to Kid's Delight, guest hosted by Gayathri themed on Crunchy Snacks for Kids

Also to Harini who is guest hosting Pari's 'Only Baked'


And finally to Susan who is celebrating the kickoff of the four year of the popular MLLA, one of my favorite events.


Check out the Blogging Marathon page for the other Blogging Marathoners doing BM#7

Friday, July 8, 2011

Paneer 65 Recipe | Indian Cottage Cheese Golden Fries | Easy and Quick Snack for Kids

Guess I need not say how much we love Paneer at home. By we I meant Konda, Peddu and myself. I can surely trust them to finish off anything paneer. While Chinnu loves to eat the paneer in PBM, he doesn't like it otherwise. Of course in most times when I make this snack there is hardly anything left for the elders at home. I simply added my name to the list to say they get the liking from me..:)

We have our club restaurant making something called as Andhra Paneer, a dish that is very spicy and super delicious (I know my dad will be furious reading the word super, but I guess it's now part of the language) Anyway they also have something called Paneer 65. We always order only paneer starters and of course paneer gravy for the meal. We never can get tired I tell you!

Those were those days, these days with the paneer being made at home so often, I am really tired of making just the same old menu. And it's cumbersome to make everybody eat that every week. So we resorted to making these different starters, which disappear the moment it's made. Remember Paneer Bonda? Well this is another batch that got done. 


Ingredients Needed:

Paneer / Indian Cottage Cheese - 400 gms, cubed into big pieces.
All purpose flour / Maida - 1 tbsp
Ginger Garlic paste - 1/2 tsp
Chili powder - 1 tsp
Cumin Powder - 1/2 tsp
Garam Masala - 1/2 tsp
Corn Flour - 1 tbsp
Chat Masala - 1/2 tsp
Salt to taste
Oil for deep frying
Method to prepare:

I used homemade paneer. 

Take all the ingredients in a bowl. Mix together so that all the ingredients coat the paneer pieces well. Sprinkle some water to make sure the flour sticks to the paneer. 

Heat a pan with oil. Once it's hot, gently drop in the paneer pieces and fry on all sides.

Drain on a kitchen towel. 

Enjoy with ketchup

Paneer 65 ver 1 on Cooking 4 all seasons
Other Easy and Quick snacks for Kids

Friday, July 1, 2011

Paneer Bonda | Easy and Quick Snack for Kids

As I may have said many times, Paneer in any form is most sought out at home. Off late with the frequent power offs, we run the risk of getting the milk spoilt. So we end up with loads of paneer all the time. And of course given the fact that Konda and Peddu love Paneer dishes we always try to make different snacks with it. Hubby dear has strictly asked me not to serve him PBM, with the frequency I ended up making it. 

So the next best thing we decided to do are these snacks for the kids. Konda loves all the varieties we make. This crumble paneer was what I had ready to make those Mini Cinnamon rolls. I ended up having more than I needed, so made these bondas for them. It disappeared quicker than I made them!

Sending this to Champa for Kid's Delight themed on Mini Bites


Ingredients Needed:

For the batter

Gram flour / Besan - 1/2 cup
Maida/ all purpose flour - 2 tbsp
Chilli pw - 1/2 tsp
Salt to taste
Cooking Soda a pinch

For paneer balls

Crumbled panner - 1 cup
Corn flour - 1 tsp
Ginger Garlic paste - 1/2 tsp
Garam masala - 1/4 tsp
Cumin powder - 1/4 tsp
Chat masala - 1/4 tsp
Salt to taste

Oil for deep frying

Method to prepare:

Crumble the paneer and mix in all the ingredients. Divide into small tight balls.

For the batter, take the ingredients in a bowl, slowly add water and make a semi thick batter.

Heat a kadai with oil. Roll the paneer balls in the batter and deep fry them in hot oil

Cook on all sides and remove to a kitchen towel.

Enjoy as such or with sauce!

Sunday, June 19, 2011

Cheest Toast with Thyme, Red Chili Flakes and Roasted Onions | Quick Microwave Mini Bites

I guess when you are pressed for ideas you really come out with some fantastic dishes. Like these Cheesy Toast with Thyme, Roasted Onions with Red Chili Flakes all made within 3 mins in microwave. well I had the need to make some Party Appetizers in Microwave and come up with a post for BM. With the limited time I had on hand, I was really stretching my ideas far.

Well I don't claim this was an innovation. Only made it differently to suit all the events that this entry has to go..:) Plus the fact that I have now got a new snack that Konda will love it and I can easily get it done is a boon. I normally can't get her eat onions, but in this dish she wanted more of it. And I ended up making it for her again.

So sending these Cheese Toast to Lavanya who is hosting the MEC this month themed on Party Appetizers. I hope you guys will plan to send something.

And to Champa for Kid's Delight themed on Mini Bites.


Ingredients Needed:
Bread Slices - 4
Onions - 1 medium
Dry Thyme - 1 tsp
Mozzarella Cheese - 1 tbsp
Salt to taste
Red Chili Flakes - 1 tsp or less

Method to prepare:

Trim the bread slices on the sides. Cut into 4 squares.

Chop Onions as julinnes, toss in oil and microwave for 2 mins. These onions turn really well roasted.

Spread the grated cheese on the four squares. Place the roasted onions on top of the cheese. Sprinkle Dry thyme, Salt, Red Chili flakes on top. Micro for 1 minute.

These are ready to munch on.


Notes: It helps to have Red chili flakes ready on hand for such dishes. Making these as mini eats makes it easy to eat as otherwise the bread might get chewy. This will be a quick dish that you can serve at parties, if you have all the other ingredients ready.


Check out the Blogging Marathon page for the other Blogging Marathoners doing BM#6

Friday, June 17, 2011

Eggless Butterless Banana Chocolate Muffins

Next in the Mini Bites series I have these delicious Eggless Butter less Banana Chocolate Muffins. As you must already know my kids love anything chocolate and I had some very ripe bananas which were begging to be used. So I thought I should address both in one shot and that's how this muffin came into being created.

I don't actually think I should deprive my kids their share of butter or Ghee. Infact I remember my kid's pediatrician telling me that I can give 2 tsp of ghee to the kids without fearing. We always make sure we add ghee to their dal rice and any curry that they like to eat.


So you know it's only natural I never think twice about adding butter to the baked dishes. It so happened that I didn't add and was surprised that the muffins turned out quite well too.

This is seriously such a simple recipe to get done that you will not believe once done. I didn't bother to take step by step as I have already taken enough recipes, check these Eggless Vanilla Muffin for step by step pictures. I pretty much did the same way. The recipe is very straight forward mixing and baking, no beating or creaming required.

This recipe might again look like a repeat of previous muffins on the blog, but I want to record every small change I have done to a recipe and that which came out prefect.

Eggless Butterless Banana Chocolate Muffin

All Purpose flour / Maida - 1 cup
Corn Flour - 2 tbsp
Cocoa powder - 2 tsp
Cooking Soda -  2 tsp
Icing Sugar - 1 cup

Wet Ingredients

Banana Puree - 3/4 cup
Milk - 1/2 cup

Chocolate Chips handful

Method to prepare:

Measure cornflour in a cup and add the flour over it. Then shift it together with cocoa and cooking soda. Add in icing sugar.

Pre heat at 185 deg C

Make a puree of the banana. Fold in the banana puree into the dry ingredients and gently combine everything together. Then add the milk.
Line the muffin tray with liners spoon in enough to fill half of the cups.

Bake for 12 mins at 185 degree C first and then at 155 for 3 mins.

Allow it to rest for 10 mins.

You might wonder at the shapes and the number. Though I got about 12 min muffins, they disappeared before I could even set the scene. I was left with only these for the picture..I guess that's really good right.

Sending this to Champa for Kid's Delight themed one Mini Bites.

Check out the Blogging Marathon page for the other Blogging Marathoners doing BM#6

Tuesday, June 14, 2011

Iyengar Bakery Khara Biscuit – Karnataka Special | Indian Cooking Challenge for May | How to make Khara Biscuit Step By Step Recipe!

This month for Indian Cooking Challenge, I thought I should finally attempt at baking and this Iyengar Bakery Khara Biscuit is a specialty dish from Karnataka.

I have always been obsessed about baking savory biscuits. Though I have been baking for a long time, I never really made much of a savory dish. Especially those salted biscuits you get at the local bakery tastes really so yum.

So when I was chatting with Champa, I just mentioned that for this May Month challenge I was looking at doing something completely new as in terms of the cooking method. I said I wanted to bake and wanted it to be a savory dish. Now something traditionally Indian and baked dishes are not something that comes to mind right away right.

I of course remembered my bakery butter biscuits. But I cannot really be tagging it as something traditional though I remember my Amma making smilier butter biscuits in a sand shifted oven that used to be common in those days. It was literally heated sand on which they place a kadai and bake. Now I don't really remember how else it was used. But the biscuits used to come so well.

Anyway Champa remembered she makes a Khara Biscuit which tastes very much like the ones that is available in bakery shops. I asked her to share the recipe, she went one step ahead and posted it with great pictures.

As always I left to making this recipe till the last moment and hasten to make it this weekend. The preparation and the entire process is not that time consuming or tough to handle. I say this as I had to click through the entire process myself with everybody else busy with the TV. I was glad that everybody liked it except Chinnu. Somehow he is not very enthu about new dishes that are not chocolate.

I always have this confusion about what a cookie is or a biscuit. These Savory Shortbread cookies are just as delicious as the savory biscuits we get in bakery, so you are good at calling it anything.

For once I followed the exact measurement, hoping it will get disappeared being a savory biscuit. I only reduced the chilies much for the kids. And I made use of the measurements I got recently and surprisingly it had a 1/3 cup. You won't believe a while ago I was literally scratching my head to visualize exactly how a 1/3 cup amount will be, did I tell you that I am not really that good at Maths? Well now you know.

Lets check out the recipe

Step by Step Pictures


Iyengar Bakery Khara Biscuit

Ingredients Needed:

All purpose flour / Maida - 2 cups/ 250 gms
Butter - 1/3 cup softened or about 5 tbsp
Sugar - 4 tsp
Salt - 1 tsp
Green Chillies - 1 (more per taste)
Coriander leaves/Cilantro - few twigs
Curds/Yogurt - 3 tbsp (start with 2 TBSP)

Method to prepare:

Preheat the oven to 170 C.

Grease the baking tray with butter/ oil. Set aside. Check Champa's notes on how to use parchment paper.

In a bowl, shift the flour and salt together. Set aside.

In another bowl, cream butter and sugar till creamy. Add the 2 tbsp curds and continue to beat.  Add the dry ingredients and mix slowly. You can add the flour slowly and after a while have to use the hands to mix well. Just blend everything well together.

The dough was too stiff, so I added another tbsp of curds. Add the chopped cilantro and chillies.

Dough will have to be crumbly not wet at all. Roll the dough into 1/4" thickness.

As the dough was stiff I didn't need any flour and was able to roll out without it getting struck.

Cut with your cookie cutters. Place on the baking tray and bake for 15 minutes at 170 C. I checked at this time and it was done, maybe because I baked at higher temperature.

Check at halfway and rotate the biscuits.

Cool on the wire rack in the sheet and when cool, transfer to an air tight container.


Notes:

These cookies don't brown. When I tried baking for 2 more mins, the bottom had a golden brown look. These remain soft when hot but become firm once they are cooled.

You can change just about anything instead of coriander leaves/cilantro like Mint leaves, curry leaves etc. I guess even those other herbs would suit very well.


***********************************************************************
Tomorrow we are going to start the 6th Edition of Blogging Marathon, be sure to check out!

To all my ICC members, please link your Bakery Khara Biscuit post to Mr. Linky.