When it came for the time to decide for this month's Indian Cooking Challenge, I completely got off the trend and forgot that Lataji had given me the recipe, and also a pictorial post for us to know ahead on how to make these Cholafali, a Gujarati Farsan specially made for Diwali. I was happy in selecting this as I wanted something special for Diwali for the readers.
Hope you will enjoy making this snack for this Diwali. We have been interacting on this savory for as long as two months, since Lataji told me about her Gujju friend. I was so happy when she offered to make it ahead so that we can have enough notes to get it right ourselves. I must thank Lataji for doing this snack ahead for us, as I ended up looking at the post during my preparation of this snack.

I did a quick check on the net wanting to check if there were other versions of this interesting snack and quickly landed in Preeti's space, who has a recipe with a different measurement. So I decided we can have two different proportions as a choice.
I ended up buying ready made flour for Urad dal and Moong Dal. But on sieving the flours I realized the Moong dal should have been made from Split yellow dal and not from whole skinned Moong dal, as it had that typical raw smell. Though I am just assuming on this. I adapted from Lataji's version and had asked Amma to help me making this.We went by the instructions to the T, however we felt the dough could have been little more softer in our case as it was extremely hard to pound it. Again I could be wrong on this.
The first time I let it rest for just couple of minutes, though later we realized that it needs about 10 mins of resting. Also the oil was not enough, so we ended up dusting with All purpose flour and rolled out very thin. When the dough was wee bit soft and rested for 10 -15 minutes, we were able to get puffed up cholafali, else it did turn crispy though they didn't puff up. Pounding was done about 10 mins on each ball.




Ingredients Needed:
Gram flour / Besan - 2 cups
Mathia flour - 2 cups (alternately, mix 1 cup each of powdered urad dhal and powdered moong dhal)
Ghee - 2 tbsps
cooking soda - 1/8th tsp
Salt as per taste
Oil - 4 tbsp
Oil for deep frying
For sprinkling on top:
Red chilli powder - 3 tsps
Black Salt / Kala Namak - 3 tsps
Notes: The salt to be added should be first dry roasted in the pan that you are going to deep fry the cholafali. This way it will not absorb lot of oil during frying. Make sure you don't add too much as you will be sprinkling black salt on the fried snack.
Original recipe says we need to use 4 tbsp for pounding and to grease the surface. We had the need to dust the dough with Maida before rolling out thin sheets. So one will ultimately check out the dough that's formed.
How to Make Cholafali / Chola Fali
In a wide bowl, take all the flours along with the roasted salt and soda. Sieve it together and mix well.
Add the ghee to the flour. Mix well.
Now start adding very little water and knead to a stiff dough. At this stage the recipes says it should be so stiff that you may feel it crack. But I think you can add few more drops of water and knead again.
Rest the dough for 10 - 15 minutes.
Clean a portion of the kitchen floor / counter top for pounding the dough.
Before starting to pound, knead the dough again. Then divide the dough in smaller portions. Using a pestle, beat the dough down on the clean surface adding few drops oil every now and then. Repeat the fold / beat/ grease/ fold operation until the dough feels light and elastic and acquires a lighter shade.
After few times we realized that we had to dust it with all purpose flour and we did it. I am not sure how authentic this step is, but it surely helped us get the rolled out sheet very thin and off the surface.
Repeat with the entire portion of the dough.
Keep this dough covered while you pinch out small balls off it and roll out thin discs.
It is advised to keep the rolled discs also covered to avoid drying by exposure to air. Since we fried in batches, the rolled out pieces were fried right away.
Keep the oil for deep frying on.
Cut out strips off the dough.
Meanwhile, mix the black salt and red chilli powder in a bowl and keep ready.
When the oil is hot, deep fry the strips, few at a time in hot oil.
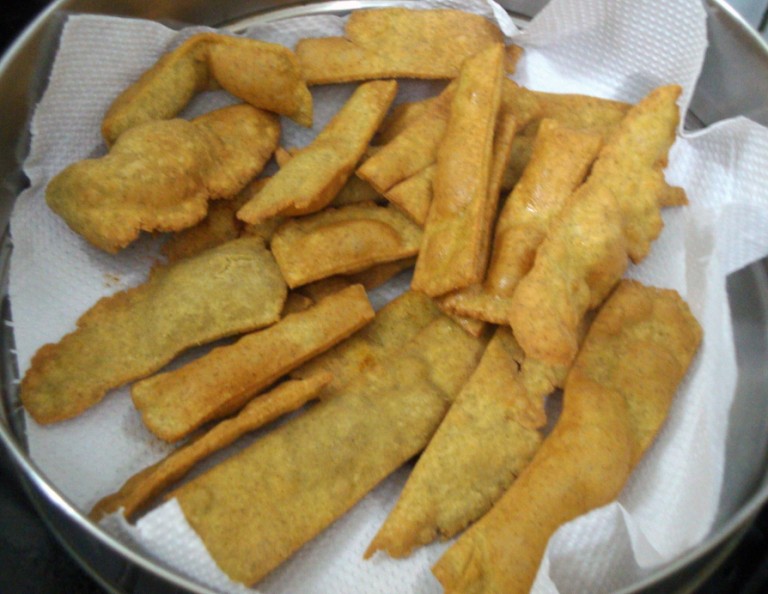
Depending on how well you have pound and rolled out, the cholafali will puff well. Fry them until they are crisp.
Remove from the oil with a slotted ladle and transfer to a dish.
Check for the crispness and sprinkle the chilli-salt mix on top immediately while the falis are warm.
Serve them as a snack and enjoy!
Notes:
The dough has to be stiff but still pliable. This is got by pounding well.
Beating it down well ensures that the falis puff well.
Make sure you roll out very thin, as thick strips will tend to become soggy.
Do not add more than the required amount of oil. Else it will end up being very oily. To make sure you are able to handle it well, you can dust it with little flour.
Mathia flour - 2 cups (alternately, mix 1 cup each of powdered urad dhal and powdered moong dhal)
Ghee - 2 tbsps
cooking soda - 1/8th tsp
Salt as per taste
Oil - 4 tbsp
Oil for deep frying
For sprinkling on top:
Red chilli powder - 3 tsps
Black Salt / Kala Namak - 3 tsps
Notes: The salt to be added should be first dry roasted in the pan that you are going to deep fry the cholafali. This way it will not absorb lot of oil during frying. Make sure you don't add too much as you will be sprinkling black salt on the fried snack.
Original recipe says we need to use 4 tbsp for pounding and to grease the surface. We had the need to dust the dough with Maida before rolling out thin sheets. So one will ultimately check out the dough that's formed.
How to Make Cholafali / Chola Fali
In a wide bowl, take all the flours along with the roasted salt and soda. Sieve it together and mix well.
Add the ghee to the flour. Mix well.
Now start adding very little water and knead to a stiff dough. At this stage the recipes says it should be so stiff that you may feel it crack. But I think you can add few more drops of water and knead again.
Rest the dough for 10 - 15 minutes.
Clean a portion of the kitchen floor / counter top for pounding the dough.
Before starting to pound, knead the dough again. Then divide the dough in smaller portions. Using a pestle, beat the dough down on the clean surface adding few drops oil every now and then. Repeat the fold / beat/ grease/ fold operation until the dough feels light and elastic and acquires a lighter shade.
After few times we realized that we had to dust it with all purpose flour and we did it. I am not sure how authentic this step is, but it surely helped us get the rolled out sheet very thin and off the surface.
Repeat with the entire portion of the dough.
Keep this dough covered while you pinch out small balls off it and roll out thin discs.
It is advised to keep the rolled discs also covered to avoid drying by exposure to air. Since we fried in batches, the rolled out pieces were fried right away.
Keep the oil for deep frying on.
Cut out strips off the dough.
Meanwhile, mix the black salt and red chilli powder in a bowl and keep ready.
When the oil is hot, deep fry the strips, few at a time in hot oil.
Depending on how well you have pound and rolled out, the cholafali will puff well. Fry them until they are crisp.
Remove from the oil with a slotted ladle and transfer to a dish.
Check for the crispness and sprinkle the chilli-salt mix on top immediately while the falis are warm.
Serve them as a snack and enjoy!
Notes:
The dough has to be stiff but still pliable. This is got by pounding well.
Beating it down well ensures that the falis puff well.
Make sure you roll out very thin, as thick strips will tend to become soggy.
Do not add more than the required amount of oil. Else it will end up being very oily. To make sure you are able to handle it well, you can dust it with little flour.
Preeti's version of Cholafali
Ingredients
Besan / Chana dal flour / Gram Flour - 1 cup
Urad dal flour - 1/2 cup
Oil - 1 tsp
Red chilli powder - 1 tsp
Cooking soda - a pinch
Normal salt & Black salt to taste
How to make cholafali
Boil 1/2 cup of water and add oil, salt and soda into it.
Take the flours in a bowl, when water gets warm, slowly add to the flour and knead a dough. Keep aside for 15 minutes.
Make small balls of dough and roll out very thin rotis of it.
Cut it into thin strips. Deep fry in oil on medium flame.
Sprinkle red chilli powder and black salt on it. Store it in a airtight container.
Serve it with mint chutney.

Even though in between the process we felt we got struck with the recipe, we managed to get it done very well. I mostly think of making half the measurement that's given. This was the first time I felt I should make the entire measurement given, knowing and seeing how well it had been in Lataji's pictures. Anyway I was so happy that Konda loved this so much that she has been taking this for her snacks daily.
Everybody at home, knows that I am into my ICC experiments when I make such elaborate preparations. They were curious to know which state I was doing this time. There was even expressions that said why should I want to try such hard and unknown dishes. Well I guess after tasting such a tasty dish, I am sure they will not complain again.
Plus even though we got so much of it, it's completed now. This is surely something that you must try. Though I know this needs practice over years.
Everybody at home, knows that I am into my ICC experiments when I make such elaborate preparations. They were curious to know which state I was doing this time. There was even expressions that said why should I want to try such hard and unknown dishes. Well I guess after tasting such a tasty dish, I am sure they will not complain again.
Plus even though we got so much of it, it's completed now. This is surely something that you must try. Though I know this needs practice over years.
To all my ICC members, please link your Cholafali post to Mr. Linky.


