Friday, July 29, 2011

Oven Baked Potato Chips | Homemade Potato Wafers | Step by Step Recipe

Today is the last day of the Blogging Marathon# 7. As always Blogging Marathon is sure to get your adrenaline up, at least it sure does mine. The first week kind of went off well. I was happy getting to know and make some new dishes. Even when the second week started, I wasn't sure which ones to make, though I decided on Crunchy Snacks, in lieu of Kid's Delight.

Finally after much thought I decided I should bake some cookies, both sweet and savory. So I experimented with some of the recipes that has been with me for a while. 

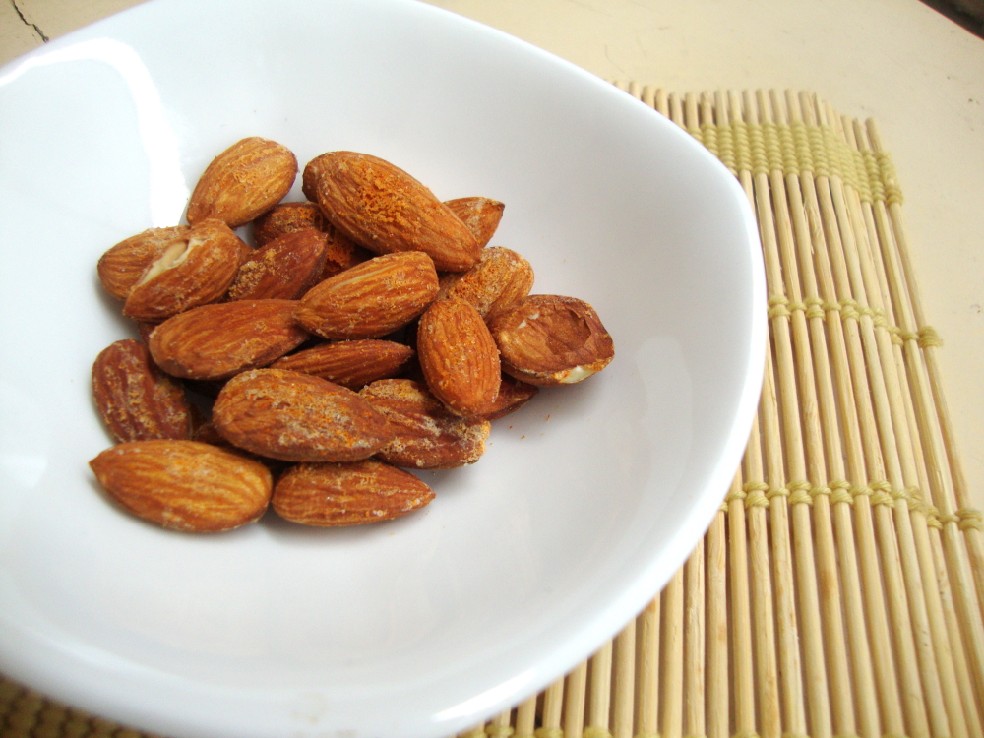
After four days of cookies, I thought I should do something different. So you saw some baked nuts, baked masala nuts and finally today baked Potato Chips. I recently deep fried Potato Chips. And thought baked version must also be great. I remember Divya doing it.

I got a very thin potota slicer from Amma, so the chips came out really thin. I had totally baked it for 20 mins, I think 18 mins should have been enough. But Konda loved it with the browned sides and all. So in the end it really doesn't matter as long as your kid loves to eat it. 

Step by Step Recipe with Pictures to bake potato chips at home


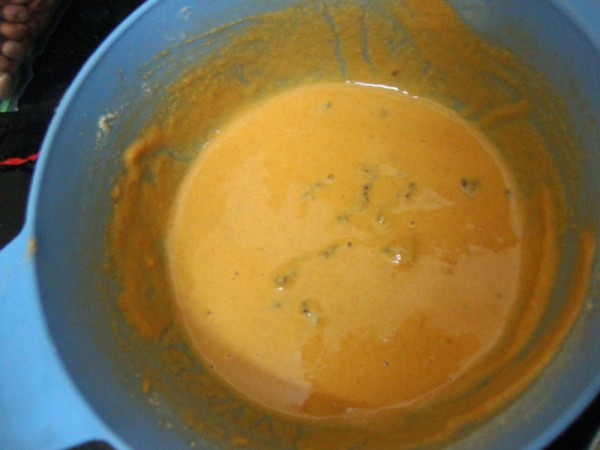
Toss oil over the chips and mix well.
Ingredients Needed:

Potatoes - 4 medium
Salt - 1/2 tsp
Red chili powder - 3/4 tsp
Oil - 2 tsp

How to bake Potato Chips at home


Wash and peel the outer skin of the potatoes, pat dry and using the slicer, slice them into thin ones.

Wipe the sliced chips over a cloth, take them in a bowl, add oil. toss it well.

Then spread them over a greased baking tray. Pre heat the oven at 200C, then bake for 10 mins. Turn over the potatoes and again bake for 5 mins.

Turn them over again, bake this time depending on how well the chips are done, for 3 - 4 mins.

Remove, sprinkle salt and chili powder.

Sending these to Kid's Delight, guest hosted by Gayathri themed on Crunchy Snacks for Kids

Also to Harini who is guest hosting Pari's 'Only Baked'


If you missed out the posts in the Blogging Marathon, check them out now.

Group 2

Group 1

Check out the Blogging Marathon page for the other Blogging Marathoners doing BM#7

Thursday, July 28, 2011

Baked Masala Peanuts | How to make Oil less Masala Groundnuts with Step by Step Recipe

Couple of days back, Amma made some Masala Peanuts for Daddy's rendezvous. She told that Daddy asked specifically for these spicy masala groundnuts. Though we end up making this snack quite often at home, it is always sought after for any occasion.

I came back home to find a box full of it and after a while realized that the box was almost empty. I even skipped my dinner because of these. Anyway after making cookies non stop for four days, I thought I must do something else for the marathon. That resulted in me remembering those baked almonds. Then I remember reading a baked version at Jungalbandi. I checked their post to see the timing they used to bake these delicious treats. I knew right away what I was going to make. So I made my usual version and baked it this time.

It's surprising how easily you can adapt a recipe into a healthier version. This baked version is oil less and guilt free. I made the masala for peanuts the usual way I make. I didn't have enough time to add curry leaves or crushed garlic but had dried Mint leaves which gave a nice ting to the baked peanuts. But would surely be adding the rest I missed out, the next time I am making this.


No one believed that these were baked or oil less. Except looking little pale, these tasted just as good, maybe a bit less, but nevertheless the same in taste wise. I don't think I might again want to deep fry these masala peanuts again. Though I had called the deep fried masala peanuts as healthy snacks for kids, this will surely take the cup for being the healthier version of the masala peanuts.

Step by Step Recipe with Pictures


Baked Masala Peanuts / Masala Grounds

Ingredients Needed:

Fresh Ground nuts/ Peanuts - 1 cup
Besan / Gram flour - 1/2 cup*
Rice flour - 1 tbsp
Salt to taste
Chili powder - 1 & 1/2 tsp
Water enough to make a stiff dough
Dried Mint leaves couple of them (opt)

*This recipe may actually require more gram flour depending on how you mix it. Increase salt and spice after adjusting the taste.

How to make masala peanut in oven:

Pre heat the oven at 200C.

Wash the peanuts and let it drain.

In a bowl, besan, rice flour, dried mint leaves, salt and chili powder Mix well and remove couple of tbsp of flour mix separately. To the rest in bowl, add water slowly to a get a dripping consistency. Then add the peanuts to the bowl. Mix well, make the peanuts are coated all over.

Then sprinkle the two tbsp of flour you had kept aside and get a dry batter. Add more flour if required. It should basically be dry and not watery.

In a greased baking tray, transfer the peanuts and make sure you spread them as much as possible. When the peanuts are clinging to each other, there are chances that they don't get baked well enough.

Bake at 200C for 10 mins. Toss them around and again bake for 10 mins.

Allow it to cool. When you handle them right way, the peanuts will be soft. But once they cool down, they turn very crunchy and crisp.

I felt I should have baked for couple of minutes more when I saw couple of peanuts clinging together, and maybe that was the reason for it to be soft inside. Most of the other peanut that got baked as a single nut was very crispy.

Sending these to Kid's Delight, guest hosted by Gayathri themed on Crunchy Snacks for Kids

Also to Harini who is guest hosting Pari's 'Only Baked'


And finally to Susan who is celebrating the kickoff of the four year of the popular MLLA, one of my favorite events.


Check out the Blogging Marathon page for the other Blogging Marathoners doing BM#7

Tuesday, July 26, 2011

Microwave Roasted Spicy Almond | Easy and Quick Snack for Kids

This must surely be the most easiest snack one can make in just matter of a minute. We mostly eat almonds as such, never really bothered about spicing it up or doing anything else with it. I wanted to send these almonds for Kid's snack box and wanted make something different other than just sending it plain. 

In the end it so happened that it was a holiday for the boys and we see that they have an unexpected long weekend. So we ended up munching it at home. 

There is really no recipe for this. Take half cup of almonds in a microwave safe bowl. Add two drops of oil, 1/2 tsp of salt and 1/2 tsp of Chili powder. Toss it around.

Microwave for a min. Let it rest for few minutes. It becomes very crunchy and crisp, not to mention spicy snack to munch.

I had planned for couple of more savory cookies and sweet. But I guess we got overloaded with the many cookies that I baked. So wanted to do something different.

Sending these to Kid's Delight, guest hosted by Gayathri themed on Crunchy Snacks for Kids

Also to Harini who is guest hosting Pari's 'Only Baked' since I think I can consider this as baked..:)


Check out the Blogging Marathon page for the other Blogging Marathoners doing BM#7

Nankhatai | How to make Nan khatai with Step by Step Recipe

Nankhatai is something that I have been hearing over the many years since blogging. Infact I came to know of the word only after blogging. In our neck of the woods, we call it butter biscuits, ghee biscuits, and some. So Nankhatai sounded very mysterious. When I finally read couple of them, I realized that it's the same.

I have made butter biscuits with both shortening and butter. But I must admit the taste varies when it comes to making it with ghee. When Simmi posted her family recipe that they end up making for Diwali, I was so taken in by those white baked treats. I had ever since wanted to bake them but never came around.
So when I decided I was going to get out all my bookmarked cookies, this was naturally one of my choice.

When I set out to make these, it was pretty late by which time everybody went to bed, so I had the entire place to self. Simmi had given for a kilo measurement. I reduced to a cup and the only ingredient I had to thick twice was rava / semolina that was added.

After having all the ingredients ready, I then had a doubt with the amount of ghee that used. The ghee that I had was solid even at room temperature, so was not sure if I had to melt it and measure. I was reluctant to add more than what I had taken. Hoping to catch Simmi online to clarify, I was happy to see her and I pinged her right away. I always enjoy our late night chats and haven't been doing that offlate. She said that the dough has to hold up and once baked the cookies will puff up.

Since I didn't have chironji seeds and completely forgot about black sesame seeds she mentioned, all I remembered were the red colouring. I went free with that and result were some colourful cookies.

I could hardly wait for it to get done. When I finally got to taste, I realized why Simmi's Mom makes it for Diwali. It's a real treat! Thank you Simmi, this recipe is surely a keeper.

Step by Step pictures to make Nankhatai.


Ingredients Needed:

All purpose flour/ Maida -1  cup
Sugar - 1 cup,
Ghee - 1 cup
Rava / Semolina - 25 gms appr
Cardamon powder a pinch

How to make Nankhatai

Powder the sugar to a fine powder.

Grease a baking tray and keep aside.

Take the flour, sugar, rava, cardamon and mix well. Melt the ghee and slowly add to the flour, start kneading it well.

Once you complete with the ghee, the dough will almost hold up. If not also I think it should just be fine once baked.

Pinch out small balls and place on the greased tray. For the decoration, I dabbed a splash of red colour over it.

Pre heat the oven at 170 C and bake for 15 mins. Then at 155 C for 5 mins. Allow it cool.


I felt sorry about the hasty pictures but I really couldn't help at taking pictures at half past 11 at night and I hope you will excuse once you taste these treats.

Sending these to Kid's Delight, guest hosted by Gayathri themed on Crunchy Snacks for Kids

Also to Harini who is guest hosting Pari's 'Only Baked'.


Check out the Blogging Marathon page for the other Blogging Marathoners doing BM#7

Monday, July 25, 2011

Onion Crackers Recipe | Baked Savory Onion Crackers | Step by Step Recipe

For this second edition of BM#7, I had planned to combine two themes together by cooking from cookbooks, all crunchy snacks for kids. Guess I plan something, something else always happens. The oft beat statement is what I have to offer, life has become hectic. How hectic is something we refuse to even think.

Result is that made me realize that life is swiftly passing away and we spend most times just trying to manage to do things on time, not really savoring that moment or doing anything that we want to do. Getting up early in order to blog, but getting caught up with something. Post is left undone, it's time for starting the cooking for the kids lunch box, breakfast. Time simply passes off so quickly that I don't even get a moment to look at the clock. I simply know it's gone.

I guess if not for Blogging Marathon, I might never feel a pressure to post something. I am not complaining, mind you. After all this is the only thing I am doing these days for myself. There were lot of things I used to do sometime back, which I no longer do now. When I see others doing it, I really wonder why I am not doing it. Like I heard couple of my friends discussing books, and I hardly know the best seller now. Not just best sellers but anything at all.

My friend of 25 years called up this morning. After cursing the world for the past 15 years, he is finally coming back to settle down with his parents. I felt so happy hearing his voice. It's really such a warm feeling hearing to the voice that reminds you of your childhood. The last time I spoke to him, I sensed a drift in his voice, now it was more clear and strong which said he did the right thing coming back to home. I was really happy for him.

I know I started this somewhere and took a turn completely off the track. But then this recipe was something that's been on my do to list for a long time. A recent resolution that I made to myself, was to simply attempt whatever comes to mind and not bookmark anymore. I hardly bookmark recipes. The ideas simply stock in the mind to take a different shape all together.

For example this onion crackers or savory cookies with onions and chilies, is something I had read on many blogs but I never really remembered the recipe proportion. When I was hard pressed for time and the need to make this yesterday, I simply used the same proportions and changed few things and arrived at this. A delightful mix of spice and flour, you have this cracker ready for your evening snacks.


Step by Step pictures to make Onion Crackers.:


Ingredients Needed:

All purpose flour / Maid - 3/4 cup
Whole wheat flour - 1/4 cup
Vanaspati / Shortening - 3 tbsp
Baking powder - 1/2 tsp
Olive Oil - 2 tbsp
Salt a pinch
Onion juliennes - half of a medium
Green Chilis - 1 long
Milk - almost 4 - 5 tbsp

How to make Onion Crackers:

Melt the shortening/ Vanaspathi in microwave for 30 secs.

In a bowl, shift the flours along with baking powder and salt. Then add the onion julienne, finely chopped green chilies. Mix well.

Slow add the melted vanaspati and olive oil. Knead to a sift dough. At this stage it depends on how well it leads to be rolled out. So add milk slowly and knead well. Read notes.

Cut out into discs using cookie cutters. Arrange on a greased baking tray.

Pre heat oven at 170 C and bake for 15 mins at 170. Check and again bake. I baked it for total 30 mins. 


Notes: After 15 mins, I thought it was enough. Though it was baked and done, after a while it became soft. so I baked for another 15 mins. It was perfect and even after storing in a box, it remained crunchy.

My dough was almost like a chapati dough but not so soft. If you want, you can pop it in fridge and reduce the milk in that process. This might reduce the baking time.

Please check after 15 mins, if the crackers are brittle to touch, they will hard up after cooling. If they are soft you need to bake for some more time. This recipe is more of an experiment in your oven. Maybe I can give an exact timing when I make this again.

Sending these to Kid's Delight, guest hosted by Gayathri themed on Crunchy Snacks for Kids

Also to Harini who is guest hosting Pari's 'Only Baked'.


Check out the Blogging Marathon page for the other Blogging Marathoners doing BM#7

Sunday, July 24, 2011

Savory Cheese Crackers | Savory Cookies with Cheese and Pepper with Step by Step Recipe

Just as in cakes, when you figure out how the basic cake works for you, you can practically do the same with the biscuit dough too. For today's post I was wondering what I should do, then remembered the Cheddar cheese that needed to be used up. I had the mozzarella cheese but past it's shelf life.

Making this was pretty easy and I didn't really feel the hassle I normally do when baking. The dough was very simple to handle. And I was happy that I used up that cheese well.

After resting it for a while, I offered it to Daddy who said it was yummy. What else can I ask. And of course my baked dishes are always appreciated by Konda and Peddu. I am not sure why Chinnu doesn't like these but he politely says no. I hope one day he starts liking these.

Step by Step Pictures for making Crackers


Savory Cheese Crackers | Savory Cookies with Cheese and Pepper


All purpose flour - 1 cup
Whole Wheat flour / Atta - 1/2
Cheddar Cheese - 3/4 cup
Baking powder - 1/2 tsp
Butter - 2 tbsp
Oil - 2 tbsp
Salt a pinch
Pepper - 1 tsp
Milk - 2 -3 tbsp

How to make Savory Cheese Crackers

Grate the cheese and keep side.

In a bowl, shift the flour together with baking powder.

Add salt and cheese to the flour, mix well.

Get the butter at room temperature, add the butter and oil to the dough and crumble well.

Add milk slowly to the dough and mix well. Add only as much as required to roll out a disc. Using a cookie cutter or any or shape, press out cookies.

Pre heat the oven at 170 degree C and then bake these cookies on a greased tray for 15 mins.

Allow it to cool before storing.


Note: I didn't count how many crackers I got, it all depends on how thin or thick you want to roll it out. You can use cookie cutter or pinch out balls and press them into thick cookies. Either ways you will have to allow it to cool down completely before munching on these delightful cheese crackers. 

Sending these to Kid's Delight, guest hosted by Gayathri themed on Crunchy Snacks for Kids. 

Also to Harini who is guest hosting Pari's 'Only Baked'.


Check out the Blogging Marathon page for the other Blogging Marathoners doing BM#7