Showing posts with label Breakfast. Show all posts

Tuesday, October 4, 2011

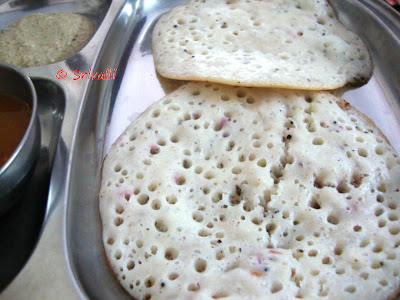
Ragi Dosa | Finger Millet pancake, Indian Style | Diabetic Diet ~ 101 Dosa Varieties!

When you plan for breakfasts in the morning, it becomes relatively easy to manage if you have ready to use Idly or Dosa batter on hand. My boys love to eat Dosa most days, while Konda is off the Dosa for a while, which is sad as she used to love Dosas so much. Anyway her fancy is anything with bread these days.

But one can't offer the same dosa every day of the week for the elders at home right. Moreover with the eating habits changed much, I sometimes have to pack Dosas for lunch or even Dinner. Then there are the times when I think I should reach my target of 101 Dosa Varieties and pester Amma to come out with some new proportions. It was one of those moments when Amma ended up trying out this instant Ragi Dosa and I must say it turned out very delicious.

By definition, we can call this instant as this batter need not be fermented after being ground. But Urad dal needs to be soaked and ground to a smooth batter. Normally any dosas made with flours like Wheat, Ragi, Jowar and others etc, are quite instant dosas. When you want to make crepes with these flours, you just have to blend into a smooth batter and make them right away. So Amma wanted to ferment overnight and see. Result was fantastic.

Moreover when you make like this, you can refrigerate the batter for couple of days if needed. Makes a great change from the regular one. And very healthy for a Diabetic Diet.


Ingredients Needed:

Ragi Flour - 1 & 1/2 cup
Urad Dal - 50 gms
Methi - 1/2 tsp

How to make Ragi Flour:

Wash and soak Urad dal for 5 hrs along with methi seeds. Then grind to a smooth paste. Blend the ragi flour with water and mix the ragi flour to the urad dal paste along with Salt.

Ferment overnight.

To make the Ragi Dosa:

Heat tawa, grease with oil. Spread a ladleful of batter and sprinkle oil over this. Cook on both sides.

Serve with chutney

Enjoy with chutney! Though I served with coconut chutney you could serve it with sambar or other healthy version of chutneys as coconut will not surely help..:)

Wednesday, September 28, 2011

Bottle Gourd Dosa | Sorakaya dosa ~ 101 Dosa Varieties

Of the many dosas I love, Adai always tops with special attention. Now it becomes really hard for me to decide which one I like more. Let's just say that I love all dosa varieties. Amma makes yummy Adais and this variation with bottle gourd is really very interesting as you get to include the vegetable in your dosas.

Adais are normally considered more healthier than the regular dosas as there is more lentil in Adais than in dosas. So I found this to be even more healthy as we included Sorakaya in it. You will not find it included at all as it gets ground in the batter. You can add as grated as such, but it might make it soggy, while grinding it along with batter made it more crispy.


Bottle Gourd Dosa | Sorakaya dosa

Raw Rice - 1 cup
boiled rice - 1 cup
Bengal, Urad, Toor - 1 cup
Dry Red chilis - 4 -5
Sorakkaya - 2 cups
Salt to taste

How to make Sorakaya dosa

Wash and soak all the lentil for 3 hrs. Then grind with dry red chilies. Once ground to a smooth paste, add grated bottle gourd and run once for it to mix well.

then remove and add cumin seeds and Hing.

Heat a tawa, grease with oil. Scoop a ladle of the batter and spread as you will do with a regular dosa.

Enjoy with chutney of your choice!

This can suit a diabetic diet when taken in moderation.

Monday, July 18, 2011

Vermicelli Vegetable Biryani | Semiya Biryani with Vegetables | Step by Step Recipe

Vermicelli was almost a staple ingredient in Amma's kitchen. Even when she used to make Semiya Upma, I made sure I had something else to eat and avoided vermicelli with vengeance. Then when I had my own kitchen, I realised what a saver vermicelli is, at times. Even then I didn't make it often enough. On the other hand, Athamma loves this and always keeps reminding me that I should get it in the regular grocery.

For all the dislike I had hearing the name, I actually end up eating it well when Amma or Athamma makes it. My problem has always been in making it too soggy. So I happily let Athamma cook this anytime she wants. She makes the best Vermicelli pulao, and the upma that Amma makes comes out awesome.

With this many varieties, I felt I should check out what the pack cover recipe talks about and found this biryani listed out. I have been wanting to make this for over months. As hubby dear has changed his eating habit and takes tiffin for lunch, this worked out really well. Since I used roasted variety it ended up being very quick and simple.


Step by Step Recipe


Vermicelli Biryani | Semiya Biryani with Vegetables

Ingredients Needed:

Roasted Vermicelli / Semiya - 2 cups
Vegetables, finely chopped - 1 cup (Carrot, Beans, Peas and potatoes)
Onions - 1 medium
Ginger Garlic paste - 1/2 tsp
Green Chilis - 2 medium
Coriander powder - 3/4 tsp
Tomato - 2 small
Cloves - 2
Cinnamon stick - 1"
Shahjeera - 1/2 tsp
Salt to taste
Oil - 2 tsp
Coriander leaves - some
Water - 3 & 1/2 cups

Method to prepare:

Take oil in a non stick pan, add all the whole spices. Then add chopped onions, saute well, followed by the ginger garlic paste. Cook for couple of mins til the raw smell leaves.

Meanwhile chop vegetables, micro for 10 mins.

Then add cooked vegetables, saute till the vegetables are dry. Then add the coriander powder, turmeric powder and mix everything well together. Then add water and bring to boil. Finely chopped coriander leaves can be added at this stage. Cover with lid and bring to boil.

Once the water starts boiling, add roasted vermicelli and mix well. Simmer with the lid covered. Stir in between.

Serve warm or cold


Notes: Cooking the vegetables in microwave speedups the cooking. If you can't micro, then add to the pan and cook till the vegetables are tender. In that case you can increase the water to 1:2 ratio.
I personally felt that instead of whole spices, I should have added them as powder as I don't normally like to munch on these and it also makes a job easy when you want to feed this to kids.

Check out the Blogging Marathon page for the other Blogging Marathoners doing BM#7

Friday, July 15, 2011

Ajwain Ka Paratha - Parathas Flavored with Carom Seed | Step by Step Recipe

Welcome to another edition of Blogging Marathon, we are running the 7th this month. I have along with me, 23 bloggers doing the two week long Marathon. I have spent considerable amount of time thinking over the themes, so I hope you enjoy them as well.

These are the themes you will be seeing us blogging for the next two weeks.

Seven days of Crunchy Snacks for Kids
Seven days of Microwave Cooking
Cooking from the back pack
Seven days Regional Recipes
Combo Meals
No butter Bakes for Diet
Cooking from cookbook

For the first week, I have chosen Cooking from the back Pack. Over the years I have saved up so many cut outs from food packets, ingredients, masala packets etc. On many occasions, I have written down the recipes, but after a while I started saving up the clippings hoping to cook from them and keep or discard based on the results. If you want to have an idea on how vast my recipe collection based on these paper backs or pack recipes, read on my recipe collection.

But for this theme, I wanted us to concentrate mostly on the pack backs. So now I have the opportunity to browse through the collection I have. I have collected many such papers from milkmaid, cocoa, macaroni etc. But I also wanted to make sure I don't repeat the main ingredient or the packet. Like there is no point if I make 7 different recipes from Milkmaid back recipes using condensed milk. So I have tried my best not to repeat the ingredient, and selected different recipes with different main ingredients. Hope you will enjoy as much as I enjoyed making them or my family eating them.

The first in the series is made with corn flour as the star. My stint with corn flour started during my college days when I was making American Chopsuey very frequently. Those were the days when Cauliflower Manchurain or homemade soups were a hit. Amma used to buy the Brown & Polson brand most and the recipes are listed at the back. They also give about couple more recipes. I have collected so many of these and always wanted to try. I was really happy finally making something from it.

For the second week, I have selected to do Crunchy Snacks for Kids, as Gayathri is hosting the Kid's Delight event themed on Crunchy Snacks.

Memories are really something, they make you feel light and carefree. Like I visited Konda's sports day function at her school. She was getting a gold medal. Seeing all those kids, yelling, running around, made me remember my own school days. Just yesterday I was talking to my schoolmate who studied with me since class 5 and we were remembering our own school days and now we have kids of that age. I know I sound so cliched, but where did the days vanish. The memories are still so fresh. At times I feel it's a big play that I am watching, and I am going to wake up and get ready for school!
I know I know I have to get to the recipe..:)


In a bowl, take flour, wheat flour, corn flour, ajwain, salt
Knead to a soft dough
 Roll out and apply ghee
 Close and roll out again as a disc.
 Cook on hot tawa.
 I took this for my lunch paired with Chettinadu Sorakkai Kurma

Ajwain Paratha - Parathas Flavored with Carom Seeds

Brown & Polson Cornflour - 1/2 cup
Wheat flour / Atta - 1 cup
All purpose flour / Maida - 1/2 cup
Ajwain / Carom Seeds / Bishop's weed - 1 tsp
Salt to taste
Ghee/ Oil as required


Method to prepare:


In a bowl, take all the flours, ajwain, salt and with water knead to a soft dough. 


As you do your regular parathas roll out as a disc. Apply ghee on top, fold into a triangle or into pleats and roll out again after dusting with flour. 

Heat a tawa and cook the parathas on both sides.


Serve with pickle and curds or as I served with Chettinadu Sorakkai Kurma


Notes: The recipe called for complete flour, so I made it healthy by adding more atta than maida.
I love ajwain as adding that gives a whole new taste, I add it to puris, samosas etc.

Check out the Blogging Marathon page for the other Blogging Marathoners doing BM#7

Thursday, March 17, 2011

Appam ~ 101 Dosa Varieties and Announcing Kid's Delight next theme

I love Appams, it was no wonder that I jumped in when Amma said she has another version of doing it. Making Appam has an added advantage as my kids love Appams along with Tomato Kurma. This version of Appam was the breakfast for Sunday and kids jumped with joy!

Coming to the Kid's Delight event, I am happy to announce that Priya Mahadevan is hosting the next edition of Kid's Delight, themed on an a very interesting one named as No Egg/No Butter, Ghee/No Sugar . Do check in her page and send her your creations.

Please check out the Round of Restaurant Recreations hosted by Champa.


Ingredients Needed:

Raw Rice - 2 cups
Coconut Milk - 1 cup
Coconut Water - 1 cup
Sugar - 1 tsp (opt)
Salt to taste
Cooking Soda - a pinch

Method to prepare:

Fermenting the Coconut Water

We normally add sugar to the coconut water for mild sweetness to the appams. You can avoid this if you want. This is done along the same time you soak your rice, about 4 -5 hrs.

Grinding the batter

Soak the rice for 4 -5 hrs and grind to smooth batter in a grinder.
To the batter add fresh Coconut milk to the batter.
Let it ferment overnight.

Just before making the appams, add soda.


Sending this to Priya for Kid's Delight, themed on No Egg/No Butter, Ghee/No Sugar .

Tuesday, March 8, 2011

Kanchipuram Dosa ~ 101 Dosa Varieties

Kanchipuram Idlis are my favorite, especially since Amma makes a special Kanchipuram Idli Podi for it. The spice powder that gets prepared for Kanchipuram Idlis are different from the regular podi she makes and that makes it all the more interesting one to make. When I had made this idli for Hubby dear the first time, he was so much taken in by that dish. Though the preparation time is no less than the usual idlis, it still made lot of difference to his liking as he normally doesn't like the plain, bland idlis he says. Though I can eat idlis all three times a day.

When I was discussing with Amma that I haven't taken up my 101 Dosa Varieties, she suggested this Kanchipuram dosa. I knew right away that this was another delicious version. I have no clue if this is a part of the Kanchipuram town or why this has that name. All I know is, we liked this a lot and Konda especially who doesn't like anything in her dosa, actually wanted those other items removed and given to her. She is still not got into the habit of eating onions or other ingredients added to Dosa batter.

Today is the final day for the Group 1 bloggers doing the Blogging Marathon. It has been another fantastic round. I will be doing another post to join the Group 2. I hope you all enjoyed as much as we did.


Kachipuram Dosa

Raw rice - 200 gms
Par Boiled Rice - 200 gms
Urad dal - 100 gms
Methi / Fenugreek Seeds  - - 1 tsp
Curds / Yogurt - 100 gms

Seasoning

This is done after it is fermented

Whole Peppercorns, broken into half. - 1 tsp
Mustard Seeds - 1/2 tsp
Bengal Gram - 1/2 tsp
Cumin Seeds - 1/2 tsp
Curry leaves few leaves

Added as such

Onions - 1 medium
Green Chilies - 1 long


Method to prepare:

The batter
Wash and soak the rice along with methi for 2 - 3 hr, grind as you would do with the regular dosas

Once the batter is ground, mix in the curds to the batter and ferment overnight.

The Seasoning

Heat oil, saute all the whole spices, add to the batter. Add finely chopped onions and Green chilies as such

Heat a tawa, grease with oil. Spread out one ladle ful of batter as the regular dosa, Simmer, cover with a lid and don't flip over.

Serve with Chutney and Sambar


The dosas are very soft and has a wonderful taste with the sour coming from the curds.

This is joining Supriya who is having a month long celebration of Dosa.


Check out the bloggers doing the Marathon along with me..
Group 1  
30 Minutes Meals: Gayathri Anand
Baked Goods: Monika,
For On Going Events: Gayathri Kumar, Usha  
Kids Friendly: PJ, Savitha, Smitha, Veena Aravind  and me
Rice Varieties: Champa, Divya, Padma

Group 2
30 Minutes Meals:Priya Mahadavan, Pavani,
Seven Days of Salad: lla, Divya Vikram,
For Ongoing 7 Events: Priya Suresh, Suma Gandlur, Harini,  
Kids Friendly: Vatsala, Jay, Kamalika
Seven Days of Rice: Veena Krishnakumar, Priya Vaasu, Padma Rekha,

Monday, March 7, 2011

Andhra Dosa - Attulu, Cone Dosa ~ 101 Dosa Varieties

I know what you are thinking, but then when I asked Amma if she knows of a specific Dosa preparation that's specific to Andhra, she gave me this proportion. She said most folks in Andhra or at least the people she knew used this combo for their Dosa preparation and call it as Attulu. Of course these days the term Dosa has become more common and not that many continue to use the other term. Whatever might be the case, when we prepared this proportion, the dosas came out really crisp.

Konda loves crispy dosas, most time will eat that crispy part as such without dipping into the side dishes. Well I guess that's just her excuse for not eating the chutney, though she claims otherwise. I love crispy dosas too and making it spread out as thin as possible was so exciting.


For the batter:

Raw Rice - 1 cup (100 gms)
Par Boiled Rice - 1 cup (100 gms)
Urad dal - 75 gms,
Bengal Gram - 1 tbsp
Methi / Fenugreek Seeds  - 1 tsp
Salt to taste

Refer the Basic Plain Dosa for details on how you grind and make Dosas. These dosas came out very crispy.

Attulu from Andhra, aka Paper Roast from Tamil Nadu


I also made a cone dosa for Konda. After you spread and make the dosa, make a slit on one side, roll it towards one side so that you have a cone formed. Kids enjoy such shapes.

Basic Plain Dosa
Paper Roast Dosa


This is joining Supriya who is having a month long celebration of Dosa, given my love for Dosas, I am excited sending her this.
Check out the bloggers doing the Marathon along with me..
Group 1  
30 Minutes Meals: Gayathri Anand
Baked Goods: Monika,
For On Going Events: Gayathri Kumar, Usha  
Kids Friendly: PJ, Savitha, Smitha, Veena Aravind  and me
Rice Varieties: Champa, Divya, Padma

Group 2
30 Minutes Meals:Priya Mahadavan, Pavani,
Seven Days of Salad: lla, Divya Vikram,
For Ongoing 7 Events: Priya Suresh, Suma Gandlur, Harini,  
Kids Friendly: Vatsala, Jay, Kamalika
Seven Days of Rice: Veena Krishnakumar, Priya Vaasu, Padma Rekha,

Wednesday, March 2, 2011

Gunta Pongadalu - Andhra Style | Paniyaram | Step by Step Recipe

Before I start on, let me thank all my wonderful blogger friends who are forever so supportive. I announced the 3 edition of Blogging Marathon, thinking I will limit it to just 12 bloggers. But the response has been so overwhelming that I now decided to create another group for the rest of them! While the first group does it from 3rd to 9th March, the second group will do it from 4th to 10th. 

I hope everybody will enjoy the fun of utter chaos! Well I am kidding, I love our daily visits. Look forward to our daily emails. They are very interesting to say the least. Though I have tweaked the themes a bit, I see that some of the hard ones are not attempted at all. Maybe I ought to force this somehow.

As expected, I stick to Kid Friendly Recipes. Call me selfish but I really want to have a long list of dishes that my kids will eat without making a fuss. So if you can help you are most welcome. So I will not only have some great recipes on hand, I hope to make some for the Kid's Delight Event too.

Now for the post! I have already blogged about Guntha Pongadalu. You might wonder why I have to blog on the same thing. If you see I already have two recipes that works out well. Amma mostly makes a special batter when she decides to make this for breakfast. There are also those occasions when we use the left over batters.

Paniyarams always remind me of the time I eat this in Madurai. It was during one of my summer vacations that we had gone there. Those were white, soft and disappeared moments it came on the table. 

Amma gave me this recipe saying that this proportion is followed in andhra. Well looks like it is followed in different places also.


Even though ours do come out soft and fluffy, as expected I used to compare with those I remember eating out. When I started working, I used to frequent the Sangeeta that was close to my office. I used to go there for evening snacks with friends. Paniyaram was famous on their menu and when I invariably order this, it used to disappear within minutes. 

Amma finally gave me another proportion that worked out even better. So what better way than this to convince my daughter to eat this. Of course as expected, I didn't season her paniyarams. But did for us.
Step by step to make Paniyaram

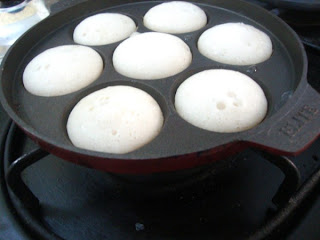
Grease the paniyaram pan, spoon the batter into the holes, sprinkle oil and simmer.
Using the pointed ladle, turn it down slowly.

Continue with the rest. Allow it to turn golden

Now all of them are well done.


Gunta Pongadalu

For the batter:

Raw Rice - 2 cups,
Urad dal - 1 cup,
Bengal Gram - 1 tbsp
Salt to taste
A pinch of Soda before using the batter
Soaking fermentation time is as usual as Dosa batter

For seasoning:

Mustard seeds - 1/2 tsp
Bengal Gram - 1 tbsp
Cashew nuts - as required
Coriander leaves
Oil - 1 tsp

To be added raw

Onions - 1 medium
Green chillies - 2 long
Curry leaves few

Method to prepare:

The batter

Soak the rice and lentils for 4-5 hours, Grind to a smooth batter and ferment overnight.

Take the required amount of batter.

Heat a kadai with oil, saute the ingredients listed under seasoning, once it sputters add it to the required batter as such along with finely chopped onions and rest of the ingredients.

Heat the paniyaram skillet and pour one spoonful of batter to the holes. You can add oil to the top if required. Cover with lid and simmer it for 5 mins. Once its cooked, turn it around using a spoon or knife.

Serve it hot with ground nut chutney or coconut chutney.

Notes:

Always use only the amount of batter that you might require, refrigerate the rest. And when it is served to kids, I have seen that they don't' like the onions.

As you might have guessed I am sending this to Kid's Delight,- hosted this month by Champa themed on Restaurant Recreations

Check out the 11 bloggers doing the Marathon along with me..  

Saturday, February 12, 2011

Bombay Grilled Sandwich | Bombay Sandwich | Step By Step Recipes

Ever since seeing these sandwiches in Bombay which was really way back in college days, I have been obsessed with the famous Bombay Sandwiches that are offered. If I am right almost a year ago I was looking at various books and reading on sandwiches when I remembered this sandwich. So I had to read on this. I have been wanting to make this since then.

Coming back from office, I made sure I got other things that is required for making another chat but only after getting back home, I realized that I forgot to buy the main ingredient. My plan was to make both the dishes today but finally settled to make just these sandwiches. 

Between I was so happy to hear Amma saying they enjoyed Dahi Samosa Chat and were expecting me to make it again. Well what more can I ask for!

I told her that I was going to make these Bombay Sandwich and she better not complete her dinner before I can make these. I made both the plain ones and grilled sandwiches. Both were excellent.

I couldn't decide which was more delicious, of course the grilled ones were out of the world and you really ought to trust me on that!


These fresh ones got soggy, well my Green Chutney was little runny and I didn't get time to drain them. Still yummy!

Coriander leaves, Mint leaves and Green chilies for the Green chutney

Cucumber slices, Onions, Tomatoes and Boiled Potatoes. Well I had even Beets but that was going little far I know!
Grated Cheese for the grilled Version.
Trim the sides, butter the slices.
Now don't ask me where the Green chutney bowl. I seem to have forgotten to click that alone. anyway you see the green chutney being spread over the butter.

Next goes Cucumber slices, Onions, Tomatoes, Potatoes and you press the other slice over this. Actually they even make it three slices, well I wanted to get this done fast!


Finally sprinkle the cheese over the slice and flip it over the other. Well this way your cheese will fall down, best was sprinkling over the other slice.

Bombay Sandwiches | Bombay Grilled Sandwiches

For Green Chutney:

Coriander Leaves - 1/2 cup tightly packed
Mints leaves  - 1/2 cup tightly packed
Green Chilies - 3 medium
Salt to taste

For Assembling the Sandwich

Cucumber Slices, Tomato Slices, Boiled Potatoes, Onion Slices as required
Butter as required
Chat Masala - 1/4 tsp
Salt to taste

Grated Cheese for Grilled version.

Method to prepare:

To make the Green Chutney

Wash and chop the coriander and mint leaves. In a mixer take the leaves along with green chilies, salt. make it into a smooth paste. Try not to add too much of water.

To assemble the Sandwich

Peel and finely slice the vegetables into thin slices.

Trim the bread on all sides if required. Apply butter on a bread, then apply the green chutney all over.

Place cucumber, tomato, onion, boiled potatoes, sprinkle salt, Chat Masala and pepper if required

Then place the other slice over one and cut into bite size.


To make grilled Bombay Sandwich:

Once you are done with placing the sandwich, spread the grated cheese over it.

I grilled my sandwich in my sandwich maker and it turned out superb.


Hubby dear was very enthusiastic seeing me do something new. There are some famous Sandwich shops that we know and he said I look like how they make. After tasting he agreed these were best. Konda loved it so much that she insisted I make some more for her. So it was really a fantastic experience making this at home. Will surely be making this again.

 
This goes to Kid's Delight themed on Street Food and to PJ's Flavors of Maharasthtra

Check out the 25 bloggers running the next 7 days for the Blogging Marathon!