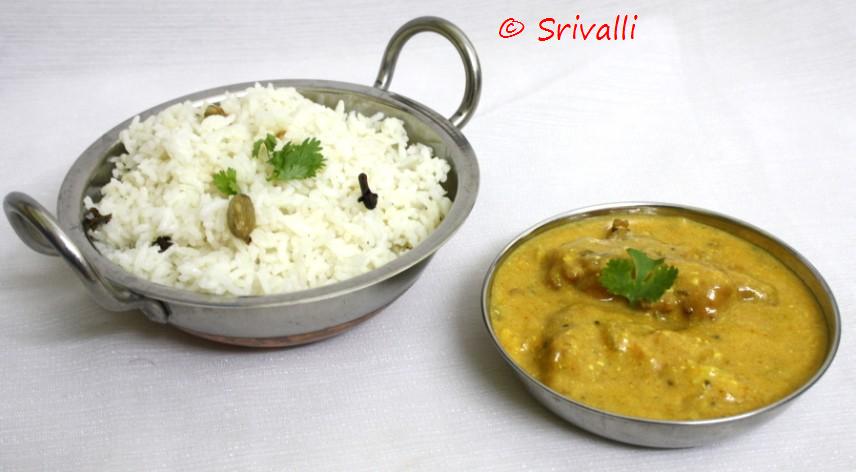
Well this is very quick if you have the Idli batter on hand. When kids refusing to eat the daily mundane breakfasts or even lunches, you really got to think out of box and plan very interesting dishes for them. And when you have three, believe me you have every reason to go crazy.
Most weeks I try to plan ahead for Konda's meals. But at times when Sundays get to be hectic, I don't get to plan well. That really gets us to have a bad start for the week. Mondays become a drag. I normally have the Idli batter ground on Sundays so that Monday breakfast is always planned. But it so happened that boys refused to have idlis. Then Peddu was ok with it, while Chinnu refuses point blank. Konda eats Idlis only if a certain chutney is made with it.
All this confusion ultimately led me to believe I should drop Idli off the menu. That ensured that we had lot of excess Idli batter on hand. Amma always spices up the Idli batter with all sorts of different stuffing and mixes. She ends up dressing them differently. Yet another idea from her was this Carrot mixed Idlis, which are a hit with kids.
Not only does the batter gets over, you can get the kids eat carrot. All three of them eat Carrots, but still it was a good idea to get them included in the breakfast.
Ingredients Needed:
Idli Batter - 1 cup
Carrot, grated - 1 medium
Onions, small. - 1 finely chopped
Green chili - 1
Salt for taste
Method to prepare
Add the grated Carrot, onions, green chilies to the batter along with a bit of salt. Mix well.
Grease the idli plates with oil and pour small scoops of this batter on to them.
Steam the idlis in the Idli cooker or steamer for 15 minutes as you regularly do.
Check if the idlis are done. Since onions are added, it might be little soft inside. So steam for couple of minutes more if required.
Serve with Chutneys.
Wednesday, October 27, 2010
Sunday, October 24, 2010
Peanut & Fried Gram Chikki Balls | Verusenaga mariyu Senaga pappu Undrallu | Indian Sweets | Diwali Sweets
Most times goodness comes in small measures. Take these peanut jaggary balls for instance, there is none that can resist yet they are not easy to make. Amma had made these a while ago, in fact it has been two months now when making Manoharam, she said we can make these also as it's one of my favorite. The fact that we were more interested in Manoharam and clicking more pictures we forgot the proportion on what went into these jaggary balls.
So I asked Amma to give me the exact measurement as it is very important to get the right consistency of the jaggary threads. Else you will end up having a brittle balls, that will fall apart right away.
Peanut Chikkis in flat bars are very famous in our parts. We never fail to pick up a handful during shopping. The problem with me is, I never know what these are called locally. Most times I refer these in Telugu and never bother finding out what it is called in Tamil.
Anyway the simple fact is it rules! As peanut and fried gram have gone into these, they make a great powerhouse of energy for kids. You can pack these for their snacks and you can snack on them too for a change. The last batch that was made, was mostly consumed by yours truly. Felt I had to make for the kids again. Chinnu loves groundnut, so getting him eat it with Jaggary is an added advantage.
I was supposed to post this for the Finger Food, then felt it asked for a different type of finger food, not a sweet included. Well I will be doing the round up in couple of days time.
Ingredients Needed
Peanut and Fried Gram - 3 cups
Jaggary - 1 cup
Ghee - 2 tsp
Method to prepare:
Take roasted ground nuts and fried grams together.Keep it aside.
Boil the jaggary in a thick bottom pan and remove the scum if any. Then add the ghee, continue boiling till you get a thread consistency that makes a ball of the jaggary. Be careful when you check this consistency.This ball thickness is normally done by dropping a tiny drop in water and rolling it into a ball. When you get a perfect ball it means it is done.
Add the nuts into the pan and mix well. You can allow it to get cool a bit before attempting to make the balls. If required dip your hands in water lightly and make balls.
Place them on a plate for it to cool further before storing these in an air tight container.
Saturday, October 23, 2010
The Diet Solution Program Updated for 2010
From PRWeb.com:
"Certified nutritionist, exercise specialist and author Isabel De Los Rios scientifically based weight loss plan has been updated to include more easy to follow meal plans, helping dieters identify food combinations designed to boost metabolism naturally for eating healthy and losing weight permanently. The Diet Solution Program has helped 50,000 people worldwide lose weight for good The Diet Solution Program.
Jamie Oliver’s Food Revolution and Michelle Obama’s Eating Healthy Food campaign are both working to educate our over-busy nation on the negative impact prolonged consumption of fast, convenient and prepackaged foods are having on our bodies and our health. Both efforts have a vision of overcoming the obesity epidemic by dramatically changing the way Americans eat.
These works aren’t in vain: an estimated 67% of Americans aged 20 and older are either overweight or obese, according to the Centers for Disease Control and Prevention. Worse still is the discovery by the University of Texas Medical Department of Obstetrics and Gynecology that more than 50% of U.S. women who are currently categorized as overweight by American standards, are actually obese when categorized by international standards.
Isabel De Los Rios understands the difficulties encountered by the overweight and obese. She herself carried an extra thirty pounds on her petite frame just ten years ago. Although De Los Rios worked to limit carbs, count calories, and eat only low-fat “healthy” foods, she failed to reverse the numbers on the scale."
You can read more about this diet solution program release at: http://www.prweb.com/releases/prweb2010/10/prweb4670904.htm%20
"Certified nutritionist, exercise specialist and author Isabel De Los Rios scientifically based weight loss plan has been updated to include more easy to follow meal plans, helping dieters identify food combinations designed to boost metabolism naturally for eating healthy and losing weight permanently. The Diet Solution Program has helped 50,000 people worldwide lose weight for good The Diet Solution Program.
Jamie Oliver’s Food Revolution and Michelle Obama’s Eating Healthy Food campaign are both working to educate our over-busy nation on the negative impact prolonged consumption of fast, convenient and prepackaged foods are having on our bodies and our health. Both efforts have a vision of overcoming the obesity epidemic by dramatically changing the way Americans eat.These works aren’t in vain: an estimated 67% of Americans aged 20 and older are either overweight or obese, according to the Centers for Disease Control and Prevention. Worse still is the discovery by the University of Texas Medical Department of Obstetrics and Gynecology that more than 50% of U.S. women who are currently categorized as overweight by American standards, are actually obese when categorized by international standards.
Isabel De Los Rios understands the difficulties encountered by the overweight and obese. She herself carried an extra thirty pounds on her petite frame just ten years ago. Although De Los Rios worked to limit carbs, count calories, and eat only low-fat “healthy” foods, she failed to reverse the numbers on the scale."
You can read more about this diet solution program release at: http://www.prweb.com/releases/prweb2010/10/prweb4670904.htm%20
Friday, October 15, 2010
Punjabi Kadi Pakoras - Indian Cooking Challenge for September ~ Step By Step Recipe!
After all that sweets and savories, I thought it should be a gravy for the Indian Cooking Challenge this month. I always have been wanting to make Kadhi Pakoras famous dish from Punjab! Kadi Pakodas are those fried dumpling soaked in a yogurt based gravy.
So I pinged Lataji to ask if she has anything in mind. She suggested Khandvi, then when I said why don't we try Kadhi Pakoras, she even searched back her repository and sent a Sanjeev Kapoor's recipe.Then I remembered Simmi and asked her if her Mom has a recipe for this. Before I could even ask, Simmi said she has a killer dish! Now that got so much interesting.
Lataji even tried it immediately for her lunch and mailed me saying it was just very delicious. Now that is going to be some wonderful change.
Lets see the recipe in step by step
Making the Pakoras:
Take the Besan along with salt, chili powder in a bowl. Have the onions all chopped and ready
Slowly add water to get a lump less batter
Then add the onions and mix well.
you can scoop out the fritters with spoon and whisk well
.
Heat a pan with oil enough to deep fry the pakodas. Scoop out with spoon just enough to make medium sized pakoras.
Once they are cooked on both sides, drain them to a kitchen towel.
Making the Kadi
Get all the ingredients together.
Heat a tbsp of oil in a non stick pan. Add a tsp each of mustard seeds, cumin seeds, carom seeds and methi. Let splutter for a few seconds.
Then add chopped onions.
Stir till it is well browned.
Make a paste with yogurt and besan, then mix with water to make a very thin batter. Pour in the yogurt/besan batter to the pan.
add turmeric powder, salt
and red chilli powder
Stir everything well.
Ensure it is all mixed well.
you can get both the pakodas and kadi get going together.
Finally add garam masala
just before removing from stove add the pokodas, bring to boil
Serve it with either rotis or rice
Punjabi Kadi Pakoras
Source: Simran of Bombay Foodie
Ingredients Needed:
For Pakoras:
Besan / Chickpea Flour - 1/2 cup
Onions - 1 medium
Salt to taste
Red Chilli powder - 1/2 tsp
Water
Oil for Deep frying
For Kadi
Curds / Yogurt - 1 cup
Besan/ chickpea flour - 1/3 cup
Water - 3 - 4 cups
Mustard Seeds - 1 tsp
Cumin Seeds- 1 tsp
Ajwain/ Carom Seeds- 1 tsp
Methi / Fenugreek seeds- 1 tsp
Onion -1 large
Turmeric powder a pinch
Salt to taste
Red Chili powder - 1/2 tsp
Garam masala - 1/2 tsp
Amchur/ Dried Mango powder - 1 tsp
Method to prepare:
For the Pakoras
Slice onions length wise. In a bowl, take the chickpea flour, add salt, red chili powder. Make a batter with water to get a semi thick consistency.
Heat a pan/ kadai with oil. When it is hot, dip onions in the batter and gently drop into the hot oil. Deep fry until crispy.
Drain and keep aside.
For the kadhi
Make a paste with yogurt and besan, then mix with water to make a very thin batter.
Heat a tbsp of oil. Add a tsp each of mustard seeds, cumin seeds, carom seeds and methi. Let splutter for a few seconds.
Add onion slices, fry till they turn light brown.
Pour in the yogurt/besan batter, add turmeric powder, salt and red chilli powder.
Bring to a boil, reduce the heat and let simmer for at least half an hour.
Keep stirring occasionally.
When you feel it is pretty thick, add the reserved pakoras, bring to boil. Add garam masala and Amchur powder to the gravy just before removing from stove.
Notes from Simran.:
She says this gravy needs to be stirred occasionally but otherwise you can leave it on its own to get cooked.
The kadhi has to be fairly thick - if you've had a thin, watery kadhi then it will be the Gujarati version. For a hearty Punjabi one,make it thick.
To all my ICC members, please link your Punjabi Kadi Pakoras post to Mr. Linky.
Friday, October 1, 2010
Mini Triangle Stuffed Paratha | Step by Step Recipes | Finger Foods for Kids
With kids at home for their quarterly holidays, I have to think not about one snack break but many that continues. When I decided on Finger Foods for Kid's Delight this month, I was sure the entries I get will surely benefit me more than anything. And knowing that time is running, I don't even have an entry myself.
Few weeks ago while I was chatting with Amma, she showed me a Telugu magazine that talked about interesting tiffins for kids. I browsed through the pictures as I can't for the life of me read telugu. Then had Amma read them for me. Couple of the paratha ideas were what I already make. The third one was called chinese style triangle paratha. Now knowing the ingredients again didn't throw why it was called a chinese. But maybe the author had a point. Anyway I was interested on the combination and the name she called it. Triangle Stuffed Paratha.
Since then I was planning to adapt the same into a finger food, making it convenient to be consumed by kids with their favorite tomato sauce!
I had something else planned for today. But with so many other things happening, I completely forgot about it and wanted to make these mini triangle parathas.
The vegetable mix for this is quite simple. You can actually add whatever is available in your pantry. As Carrots, Beans and Cabbage are eternal in my fridge I thought I will just use them.
You can get very creative in making this. I just added whatever I felt my kids will eat. Of course I ended up eating the most.
I used exactly the same amount of vegetables as shown in the picture. Have all of them ready at hand!
Heat a pan with oil, saute onions and cumin seeds
Then goes the carrot..
Followed by the cabbage, beans, and tomatoes.
Add the chili powder, tomato sauce, salt, Simmer for 5-7 mins with cover.
Meanwhile make small balls and roll out into small discs.
Make a cut in the middle to get two half moons.
Scoop out the stuffing and place in the middle.
Bring one flip towards the other to cover the stuffing as shown in the picture.
Repeat with the other half and press well to close the stuffing in.
Heat a pan with oil. Roast these triangle with oil sprinkled over it. Cook on both sides.
Once it is cooked on one side, flip to the other side.
Serve with Tomato Sauce!
Mini Triangle Stuffed Paratha
Makes : 6 pieces
Ingredients Needed:
For the dough
Whole Wheat flour / Atta - 1 cup
Salt to taste
For the Stuffing:
Onion - quarter of a medium
Carrot - 1 small
Cabbage - handful
Beans - 4-5 nos
Tomato - quarter piece
Cumin Seeds - 1/4 tsp
Salt to taste
Tomato Sauce - 1 tsp
Red chili powder - 1/4 tsp
Hot Tomato Sauce - 1/2 tsp (opt)
Oil - 1 tsp
Method to prepare:
For the dough:
Mix the flour with salt and enough water to knead into a soft dough
For the stuffing:
Chop all the vegetables into fine pieces, heat a non stick pan with oil. Sauté the cumin, along with onions. Then add the vegetables one by one. Simmer the flame and cover with lid.
Add the salt and chili powder. Mix well. Then add the tomato sauce and the hot tomato sauce if you are using it.
This almost gets done in 5 -7 mins. It will be great if the vegetables are still crunchy.
For making the mini parathas:
Heat a pan for roast the parathas.
Divide the dough into small balls. Roll them into thin discs.
Cut through in middle to get half moons. Scoop the stuffing and place over the middle. Bring one side over the stuffing and seal the sides to ensure the stuffing doesn't come out.
Roast them over hot pan and grease oil over it. Cook on both sides by lightly pressing them to make sure all the spots are cooked.
This goes to my event Kid's Delight themed on Finger Foods. Hope you are getting your entries ready!
Thursday, September 23, 2010
Mochai Sundal | Hyacinth Bean or Field bean Salad
Since having started back on a diet, thought having some salads in the evening will help. A while ago father in law had got these dried Anapa kayalu and its been with us. We normally make a kurma with it for Dosas. Athamma had soaked these in hopes of making something with it. Finally she said a salad will be much more better for the evening.
So this is how it ended up. With simple saute of onions, tomatoes, it can surely elevate to a different level! Best part being that this is liked by the boys too. Then enjoy eating these lentils provided we remove all other things that go in. Well to gain some you got to lose some!
What other dishes do you make with Mochai?
So this is how it ended up. With simple saute of onions, tomatoes, it can surely elevate to a different level! Best part being that this is liked by the boys too. Then enjoy eating these lentils provided we remove all other things that go in. Well to gain some you got to lose some!
Mochai Sundal | Hyacinth Bean or Field bean SaladMochai - 1 cupOnions - 1 medium
Tomato - 1 medium
Green Chili - 2 medium, chopped into fine pieces
Curry leaves - few
Coriander leaves - few
Mustard seeds, Urad dal - 1 tsp
Salt to taste
Oil - 1 tsp
Method to prepare:
Wash and soak the dried dal overnight. Pressure cook with very little water till soft.
Drain the water, keep it aside
Heat a non stick pan with oil. Add mustard seeds, Urad dal, curry leaves and onions. Saute will till the onions turn colour.
Then add chopped tomatoes, saute for 2 mins. Then add the cooked beans. Stir every thing well.
simmer with lid covered for couple of minutes.
Garnish with coriander leaves.
Remove and serve hot.
What other dishes do you make with Mochai?
Wednesday, September 15, 2010
Manoharam - Indian Cooking Challenge for August ~ Step By Step Recipe!
Before getting into the details of this month's challenge, I would like to thank all my ICC members for getting event cross a year! Its been a year since we are challenging ourselves to try new and varied dishes. Thank you all again. Thanks to Padma for bringing this to my notice.
This month's Indian Cooking Challenge was Manoharam. Its a famous snack from Tamil Nadu. Though it may look like murukus, the final product is quite different. These are murukkus mixed with jaggery like in Chakkli. I once bought it from stores and really enjoyed it. But Amma had never prepared it at home.
This came out really well and everybody at home enjoyed it, especially with all of them helping in making this. Since I ended up making it only today, I couldn't do it on my own. But I was glad that Amma and Athamma enjoyed making this.
These recipes are from a cookbook authored by S. Meenakshi Ammal Vol 2. Lataji has been kind enough to share the recipes with us.
The recipes are measured in small quantities. As always we are expected to pound our own Rice flour and Urad Dal flour.
PS: Only and if only you can't grind it at home, please get it done in mill or worse use store bought flours..:)
Manoharam ~ Sweet Chakli Balls..
Fry the yellow moong dal.
Sieve it to a fine powder.
Wash and soak rice flour, pound to a fine powder
Take both the flours in a bowl
Add a tiny pinch of salt and ghee. (if the jaggary you are using is a variety that might have salty taste then you can completely avoid salt)
Adding little water, knead to a soft pliable dough.
Using a muruku press, press it down once the oil is hot.
like this it goes..
Drain to a kitchen towel.
Meanwhile get the Jaggary powered. The recipe calls for just 1 cup but we had to use 1/2 cup more.
Melt it in water, remove impurities
Bring to boil and cook till you get the consistency of a ball like this.
Once this is ready, immediately add the crushed murukus to the jaggary and mix well.
This is when you will really need multiple helping hands..everybody in the family pinched in to help. Careful with the heat though.
Press it down as a ball.
Allow it to cool down further.
Recipe 1:Moong Dal - 1 cupRaw Rice - 2 cupsSalt to tasteGhee - 2 tbspOil for deep frying.Jaggery powder used in this recipe is 1 & 1/2 cup (packed upto level)Gadget: Murukku press with the three dot pore disc fitted in.4 measures in volume (As in cups) of murukku bits to 1 heaped measure of powdered jaggery would work fine.Method to prepare:Wash and soak the rice for 15 mins. Drain and spread over a clean cloth to absorb excess moisture. You can shade dry the rice for 30 - 40 mins. Grind the rice to a very fine powder.We couldn't use the dal raw, so dry roasted it. (recipe calls it to be used raw) then grind it until very fine too.Measure two parts of rice flour against one part of moong dal flour. Mix well and add some salt to the mixture. Rub in the ghee to incorporate it well with the flours. Add water and knead to a dough that can be passed through the pores of the murukku press.If you are making more than the mentioned measure, prepare the dough in batches, otherwise the murukkus become discoloured due to exposure to air.Heat oil in a pan and on a moderately hot temperature press the murukkus in the oil and fry them until they are crisp. Remove with a slotted ladle and place on absorbent tissues to remove excess oil.Once cool, break the prepared murukkus in tiny bits.Measure this by volume and the powdered jaggery.Take the jageery in a pan and add some warm water to it. Stir to dissolve and pass through a strainer to remove scum.Place the dissolved jaggery in a pan and bring to a boil. Boil this down to a syrup of a rollable hard ball consistency. You may drop few drops of syrup in cold water and roll the syrup with your fingers to form a ball. Lift the ball off the water and drop it back into the water with force. You should be able to hear the sound of ball hitting the floor of the cup. This is the correct consistency.Remove the syrup from the fire. Quickly add the bits of murukku and give a brisk stir in order that the jaggery syrup coats evenly on the pieces.While still warm and the heat is of manageable warmth, Grease your palms lightly and roll the mixture in balls just about bigger than ping-pong balls in size.Place them separately on a flat dish. Serve as such.Optionally you may cut slices of coconut and add them to the jaggery and murukku mix prior to making the manohara urundais.
Recipe 2:Raw rice - 4 cupsChanna dal - 2 cupsMoong dal - 2 cupsSalt to tasteA pinch of Soda-bi-carbOil for deep fryingJaggery is 2 cups.( loosely packed, level)Gadget: Boondhi ladleWash, soak, drain and pound the rice to a fine powder.Powder both dals raw to a very fine powder. (Sun drying the dals prior to pounding makes the process a bit quick). Mix the pounded dals together.Measure equal volume of dalcarb and with water mix to a batter of boondhi consistency.Heat oil. Hold the ladle just over the pan and rub the prepared batter to drop as boondhis into the oil. Deep fry them until done.Repeat the process until all the batter is used up.For four parts of this boondhi, measure out 1 part of powdered jaggery.Dissolve jaggery in water and strain the scum out.Bring the jaggery to a boil and allow to boil and form a hard ball syrup.Remove from fire and mix the boondhi to the jaggery.When the heat is warm enough to handle, make balls of the mix with hands.Place them apart on a flat plate until ready to serve.If in both recipes someone wants sweeter manoharams just about one tablespoon will enhance the sweet.
To all my ICC members, please link your Manoharam post to Mr. Linky.
Subscribe to:
Posts (Atom)