Wednesday, November 30, 2011

Gobi Paratha | How to make Gobi Paratha ~ Step by Step Recipe | Chapathi Varieties

I know I can talk for hours about how much I love stuffed parathas. I was glad that Konda likes the stuffed ones too. Makes it so easy for us to pack their lunch box. However she likes only the Paneer Stuffed or Aloo Stuffed Paratha. Never knowingly she would've opted for anything else.

So deciding that she should eat other vegetables, these cauliflowers went into the stuffing to make sure she will not find them out. There is no limit to experiment your stuffing and this is the second method. The first one is a simple stuffed gobi with minimum ingredients. Today's stuffed gobi uses different spices all together.

When I asked Pavani for selecting a theme for this month's Kid's delight, she quickly got back saying she wanted to sneak in healthy stuff into kid's meal, which they might other wise never eat. This Gobi paratha was made just for that idea and trust me, even if you feel you are being deceptive, this is really worth it..

Step by Step Picture Recipe
Clean and wash the cauliflower florets in cold water and then in hot water for 10 mins.Drain and keep aside.
Have onions chopped fine, green chilies and cauliflower ready.
Heat a non stick pan with 1 tsp of oil, add the finely chopped onions. Saute for couple of minutes.
Then goes the finely chopped green chillies.
1 big Minced garlic goes in now.
Meanwhile, grated the cauliflower to fine pieces.
This is enough for about 5 parathas.
When the onions are well browned, add the grated cauliflower, turmeric powder, cumin powder, ajwain, garam masala, red chili powder and salt. Mix everything well together.
Saute till all the ingredients are cooked well.
Remove and allow to cool.
Finally add the fresh coriander leaves and mix.
For the dough, knead the usual way, divide into equal balls, Flatten one ball this way on the sides.
Place one tablespoon of the stuffing
Start from one corner and keep closing the opening.
Now comes the finally part.
Enclose it completely.
Then again gather the ball as you would gather and pat again to make sure the stuffing is well covered.
Dust with maida/ all purpose flour.
And roll out. Heat tawa and cook on both sides.
Since there is no binding it might come out but you should be able to manage after the first paratha.

Serve with aam ka Achar and Dahi.

Cauliflower Paratha | Gobhi paratha | Healthy Lunch Box for Kids

Ingredients Needed:

For the Dough

Wheat flour - 2 cups
Salt to taste
Water to knead - 1 cup appr.
Ghee/ Butter - 1 tsp (opt) you can use curds instead.

For stuffing:

Cauliflower florets, grated - 1 cup
Onion - 1 medium
Green Chillies - 2 long
Chili powder - 1/2 tsp
Cumin powder - 1/2 tsp
Ajwain - 1/2 tsp
Anardana powder - 1/2 tsp (opt)
Salt to taste
Coriander leaves
Oil for frying

Butter to spread on top

How to make Gobi Paratha:

For the dough,

Take the flour in a wide bowl, add salt, water and knead to a soft but stiff dough. Keep it aside covered.

For the Cauliflower stuffing

Clean, wash and soak the florets in hot water for 10 mins. Then grate it fine. Keep it aside.

Heat a non stick pan with oil, saute the onions, then add minced garlic, green chilies. Saute till the onions are browned.

Then add all the spices, mix well and saute for couple of mins. Remove and allow to cool. Finally add finely chopped coriander leaves.

For making the paratha:

Divide the dough into equal balls. Dust the ball and flatten the sides. Place a tablespoon of the stuffing in the middel and gather from all sides to completely close the stuffings.

Again dust and roll out slowly. You may have the stuffing coming out, that's fine, roll out slowly so that the stuffing is intact.

Heat a tawa and grease with oil. Once it's hot, cook the paratha on both sides.

Remove and finally spread a bob of butter on top. Serve with Curds and Mango Pickle.

Notes:
You can add little aloo to help the binding. But this cauliflower stuffing was very soft enough to handle well.
Play with different spices amchur etc to get a different taste.

Sending this to Pavani, who is hosting my Kid's Delight event, themed on Deceptively Delicious.


Tuesday, November 29, 2011

Vazhakkai Roast Recipe, Paruppu Sambar | Lunch Box Recipes

Today we are doing the last day of the Blogging Marathon Edition 10. Can't really believe another seven days simply flew! I really enjoyed doing this edition as I did two of my favorite themes. Of course all themes are my favorite. However sharing my lunch box has always been an interesting thing for me. So I really enjoyed this week.

After raining cats and dogs, it's much better today. Though kids weren't happy that it didn't rain, they waited with batted breath to know if the schools were declared holiday again. The most funny thing was, Chinnu refused to wake up and Peddu tells me the trick to say that there is no school today. The moment I said that, Chinnu actually woke up and came up. But on seeing the polished shoes, he refused to budge. It was really so funny to see them doing these things. Though we failed to understand how they will keep themselves occupied at home.

Anyway today's recipe is going to be another version of Sambar. I was thinking, it's been an ever flow of different Sambars at home. I really tired of making only sambars. I must really be more innovative I am sure. I hope I haven't bored you guys by sharing so many versions of sambar, but trust me, each one comes out differently and very delicious. Especially when paired with the Plantain Roast that was made, the combination was deadly.

I remember this variety of Banana Roast being always seen in my friends boxes. Amma usually makes the other versions, with this being on rare occasions. I decided to make this for lunch.
Paruppu Sambar, Vazhakkai Roast with Rice ~ Our Meal

Paruppu Sambar

Ingredients Needed:

Toor Dal - 1 cup
Tamarind Water or Tamarind paste - 2 tsp mixed in 2 cups water.
Green Chillies - 3 -4
Onion, chopped - 1 medium
Fenugreek, roasted and powdered - 1/2 tsp
Asafetida / Hing a pinch
Sambar powder - 1 & 1/2 tsp
Salt to taste
Turmeric powder a pinch
Tomato - 1 small
Coriander leaves - few springs

For Seasoning
Mustard Seeds, Urad Dal - 1/2 tsp
Curry leaves few
Oil - 2 tsp

How to make Paruppu Sambar

Wash and pressure cook toor dal with turmeric and few drops of oil. Once done, keep it aside.

Dry roast methi and powder it. Keep this aside.

Heat a pan with oil, do the tempering with all the seasoning ingredients. When the mustard pops, add the chopped onions and green chillies.

Then add the tamarind water, sambar powder. Bring to boil.

When the water is boiling, add cooked dal, salt, asafetida powder, fenugreek powder.

Add chopped tomatoes. Continue boiling for about 5 to 10 minutes and stir occasionally . Add fresh Coriander leaves.

Serve with steaming rice and papad.

Notes:

If you want you can roast fenugreek in more quantity and store it.
Vegetables can also be used in this sambar.


Vazhakkai Roast

Ingredients Needed:

Raw Banana / Plantain - 2 medium
Salt to taste
Sambar powder - 1 tsp
Turmeric powder a pinch
Asafetida / Hing a pinch
Oil - 4 -5 tps (or less)
Pepper powder - 1/4 tsp
Mustard seeds, Urad dal - 1/4 tsp
Curry leaves few

How to make Vazhakkai Roast

Wash and peel the outer skin of the bananas, soak in water as you continue chopping.

Once both the bananas are chopped, drain it well and mix with all the ingredients and marinate for 10 mins.

Heat a non stick pan and grease with 1 tsp oil. add the mustard, Urad dal and curry leaves. When the mustard pops, add the marinated plantain pieces. Sprinkle oil little by little and keep stirring.

This takes about 15 - 20 mins for the plantain to get cooked and crispy.

It was wonderful having you all join me, will look forward to another session of Blogging Marathon.

This is the recap of BM#10

Preps and Preserves!
Lunch Box Recipes

Check out the Blogging Marathon page for the other Blogging Marathoners doing BM#10

Sunday, November 27, 2011

Pappu Pulusu – Pappu Charu Andhra Style - Lunch Box Recipes

This is another method to make the famous Andhra way of making a lentil vegetable stew with Tamarind base. Normally the pappu charu is not that sour but mildly made using tamarind, however in this method Amma makes use of little more of tamarind pulp that renders a little more hint of tamarind in the gravy.

Pulusu is anything that's thin in texture and we normally use tamarind in the base. Some years back, Pappu charu was the default Sunday night comfort meal. After the hectic lunch preparation, it was this mild simple comfort food.

This is was my lunch when I had made a different menu for the family. I paired it with Hing and red chilli powder seasoned potato chips.

Pappu Pulusu ~ Tamarind based lentil Stew with Vegetables

Ingredients Needed

For the Pulusu

Toor dal - 1 cup
Onions - 1 medium
Tomato - 1 medium
Red chilli powder - 1/2 tsp
Tamarind pulp - 1 lemon size.
Salt to taste
Oil - 2 tsp

Vegetables used:

Drumstick - 1, chopped into small pieces
Arbi / Colacasia / Samagedda (Chama dumpa) - 3- 4 nos
Snack gourd / Potlakaya - 1 small

Tempering ingredients:

Mustard seeds, Urad dal - 3/4 tsp
Curry leaves few
Green Chillies - 3 nos
Dry Red Chillis - 1

How to make Pappu Pulusu

Wash and cook Arbi till done. Arbi can be cooked in a pan of water or in microwave. Once cooled, peel skin and chop into rounds of 1" thickness.

Chop drumstick into small pieces. Microwave for 5 -7 mins in microwave. Prep the snake gourd and wash well. Chop into small pieces. Snake gourd can be cooked in the gravy itself. Keep all the vegetables aside.

Pressure cook toor dal till done with turmeric and few drops of oil. Keep it aside.

Heat a pan with oil, add mustard, urad dal, curry leaves. When the mustard pops add the finely chopped onions. Saute till the onions turn colour. Add green chilies, red chilies. Saute for couple of minutes.

Then add finely chopped tomatoes. Add salt, turmeric powder, simmer till the tomatoes turn soft. Then add the vegetables, saute in oil for couple of minutes.

Next add the red chilli powder, followed by the tamarind pulp. Add 1 cup water and bring to boil. When it starts boiling, simmer and cook with lid covered for 15 mins.

Serve with steaming rice and potato chips

Boiling Vegetables in Microwave
Check out how to boil Drumstick, Arbi, Potatoes in Microwave.
Pappu Charu Recipe 1

Check out the Blogging Marathon page for the other Blogging Marathoners doing BM#10

Mutter Paneer Recipe | Matar Paneer Recipe With Tomato Biryani Recipe

Somehow tomato pulaos always reminds me of my childhood days. Amma makes the best tomato pulao and I have learnt it from her. This tomato pulao is a must in the menu when my sis in laws visit us. They like it so very much and always look forward to it. I normally make the tomato pulao with cauliflower subji. This time it was a different combination and this also went very well.

We make both Tomato Pulao and Mutter paneer in a different method. This is second method of making. I adapted the Mutter Paneer from Sanjeev Kapoor. This is a simple gravy dish that makes a great side dish for biryanis.

Looking at the tomato biryani, I was reminded of my childhood days when Amma used to add fried bread pieces on the top. Somehow that takes it to the next level. When you take a bite of those fried bread with the delicious biryani, it's sublime! You must try this combination to enjoy on a weekend.

With the rains that's pouring insistently in our place, this makes a great meal!

Tomato Biryani

Ingredients Needed:

Basmati Rice - 1 cup
Onions - 3, julienne
Cloves - 2
Cinnamon - 1", 2
Cardamon - 2 nos
Bay leaves - 2 pieces
Ginger Garlic paste - 1 tsp
Green Chilli paste - 1 tsp
Tomatoes,  puree - 2 big
Red chilli powder - 1/2 tsp
Mint leaves - a handful (chopped)
Coriander leaves - a handful (chopped)
Oil - 4 tbsp
Butter - 1 tsp
Salt to taste
Water - 1 & 1/2 cups

Garnish
Bread slices - 4, cut into squares roasted Ghee - 2 tbsp
Coriander leaves

How to make Tomato Biryani

Trim and cut the bread into square pieces. Heat a pan with the ghee and roast the bread. Keep it aside.

Wash and soak rice for 15 mins. Once done, drain the rice and keep it aside.

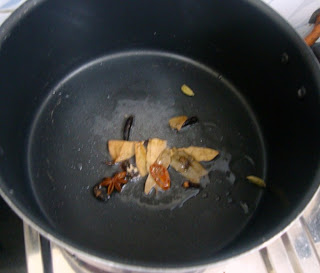
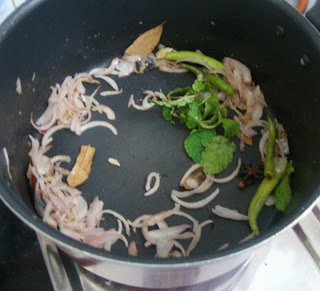
In a pressure cooker, heat oil, add the whole spices, saute for couple of mins. Then add the onion julienne, saute till they turn translucent. Then add ginger garlic paste, chilli paste, saute till the pastes till it's cooked. This takes about 2- 3 mins. Add the mint and coriander leaves.

Then add the tomato puree, turmeric powder, chilli powder and salt, fry for 5 mins. Then add the rice and saute gently, once done, add water and pressure cook for 2 -3 whistles.

Once the pressure falls down, add the butter and chopped coriander leaves and garnish with roasted bread pieces.

Mutter Paneer Recipe | Matar Paneer

Ingredients Needed:

Paneer - 250 gms
Fresh green peas - 250 gms
Ghee 2 tablespoons + to deep fry
Onions -  2 large
Ginger 1 inch piece
Turmeric powder - a pinch
Red chilli powder - 1 tsp
Coriander powder - 1 tsp
Garam masala powder - 1 tsp
Salt to taste

How to make Mutter Paneer

Cut the paneer into cubes. Heat sufficient ghee in a kadai and deep-fry till light brown. Remove and keep it aside.

Chop onions and ginger finely.

Use the same kadai with ghee, add chopped onions and ginger. Sauté till lightly browned.

Add turmeric powder, red chilli powder, coriander powder, salt and peas and cook, adding a little water, till the peas are tender and a little gravy remains.

When the gravy is cooked, add the fried paneer, garam masala powder and simmer for five minutes.

Garnish with coriander leaves, remove.

Serve hot with tomato biryani.

I took this picture that reminded me so much of my childhood times, when amma would always garnish the biryanis with fried bread pieces.

Since the biryani is tomato base, the gravy went very well as it didn't have tomato in it.

I am sending this to Sreelu who is hosting “Vegetarian Thanks giving” for Healing foods, an event by Siri. Whether I celebrate Thanksgiving or not, I have always been thankful for the wonderful memories each meal reminds me, and the many folks who have shared their memories with me. 

Check out the Blogging Marathon page for the other Blogging Marathoners doing BM#10

Saturday, November 26, 2011

Keerai Paruppu Masiyal | Thotakura Pappu | Amaranth Leaves with Toor Dal ~ Lunch Box Recipes

Though I love green colour, I can hardly say the same when it comes to eating greens. I know I really should not be saying such things openly now, now that my kids can hold it against me! Anyway though I don't like the idea of eating greens, when I prepare them, I enjoy it much. It's like you need some reasons not to like something right! This being the reason it's not often that I willing make a dal with greens or stir fry, but believe me I make greens at least once a week.

We regularly make the greens in the traditional andhra pappu style. I have seen my tamilian friends bringing this masiyal and always wanted to make it. So this time I thought I will prepare the greens with dal in Tamilian style. While making the dal I remembered Amma making the regular dals in this style, meaning cooking the dals directly in the pan of rolling water and then making a mashed dal. These days with the comfort of pressure cooker, one can't imagine cooking it directly, though the taste will surely be so much better.

I packed this for my lunch and trust me, it was so yum!

This method is called masiyal, which means you churn the dal using a dal churner or masher. The other method of making this is the simple Keerai Masiyal, where the dal/pappu is not added.

Keerai Paruppu Masiyal, Vazhai Thandu curry with Steaming Rice ~ Our Meal

Keerai Paruppu Masiyal

Ingredients Needed:

For the Greens:

Greens / Keerai - 1 bunch – (You can use any greens, I used Aarai keerai)
Green Chilies - 3 nos
Tomatoes - 2 medium
Salt to taste
Tamarind juice - 2 tsp

For Tempering / Seasoning

Mustard seeds, Urad Dal - 1 tsp
Jeera – 1 tsp
Red Chilli - 2 nos
Asafotida Powder - a pinch
Oil- 2 tsp

For the dal

Toor dal – ½ cup
Oil - few drops
Turmeric powder a pinch
Asafotida Powder - a pinch

How to prepare Keerai Paruppu Masiyal

Wash and pressure cook the toor dal with a dash of hing, turmeric powder and oil. Pressure cook for 3 whistles till the dal is well cooked. Once the pressure falls, churn it well adding little water. Keep it aside.

For the cooking the Greens/ Keerai

Pick the greens well and wash about 3 - 4 times in water to make sure the dirt is removed. Let it drain for couple of mins. Chop the leaves if required. Then take the greens in a hollow pan, along with finely chopped tomatoes, green chilies, salt. Cover and cook on high flame. There is no need to add more water than couple of tbsp of water. The greens will start to let out more water and simmer after 5 - 7 mins. Once the greens are cooked, switch off and allow it to cool a bit. Then holding the vessel, remove the green chilis if you want, churn well using the churner.

Once the greens are churned and reache a semi smooth paste, put it back on the flame, add the cooked dal, 1 cup of water. Bring to boil.

In another pan, heat oil. When the oil is hot, add mustard, urad, cumin seeds, dry red chillies, curry leaves. When the mustard pops, add the onions and saute till the onions turn brown. At this stage, add this tempering to the boiling dal. Cover immediately with lid and switch off the flame.

Serve with steaming rice and vegetable.

Some traditional dals with greens:

Thotaku Pappu - Andhra Style
Fenugreek Dal ~ Menthi kura Pappu
Gongura Pappu ~ Ambadi Dal
Palak Pappu ~ Spinach Dal

Check out the Blogging Marathon page for the other Blogging Marathoners doing BM#10

Friday, November 25, 2011

Post Thanksgiving "Clean Up"


I hope all of you in the U.S. had a wonderful Thanksgiving holiday. Now that the day is over, we slide right into the Christmas holiday full force. How will you handle this next month?

You are going to be stressed, busy and if you're not sleeping, the carb monster will rear its ugly head and take total control of you.

The average person has the ability to gain a solid 10lbs. between Thanksgiving and Christmas.

Wouldn't it feel great to be a loser during this next month? Hey, being a loser in this sense of the word is a great thing!

Now is the time to make some choices for your post Thanksgiving "clean up". You can finish your left overs this weekend and plan to start fresh on your healthy eating plan first thing on Monday. This is going to require some planning and diligence on your part. Pull from the very core for strength and resolve. If you've just begun your healthy diet plan, this will be especially difficult for you.

If you're an experienced champ, you have probably already jumped right back into action with breakfast today. Congratulations!

It's a good feeling to be in the "hop back on with the very next meal" club. You are setting yourself up for lifetime success!

If you've got leftovers, here is some advice for you. Take note of how you feel at this very moment. Are you feeling lean and energized or do you feel tired and bloated? If it is the latter, let this be your very first sign that a carb heavy meal is not the optimal choice for day to day eating. If you're new to this site or any plan, you've experienced that elation of the dehydrating effect of carbohydrate restriction. After that large carb heavy meal, it takes you back to those old days of carelessly stuffing ourselves with highly insulinogenic disease causing foods. As Jeff Foxworthy might say "Here's your sign". Your sign is the bloat and lethargy and not only is it a sign, but a valuable lesson in foods that heal and foods that kill. I'm sure that's a book but haven't the author's name at the tip of my tongue.

If the left overs are abundant, you might freeze them for other family members who are not following the same plan. Donate them to a neighbor who might not have enjoyed the pleasure of Thanksgiving dinner, let the family eat them up while you get back on your plan taking advantage of focusing on yourself for a few days. (This is the time to treat yourself to a nice filet or your favorite food that others don't particularly care for)

If there is a small amount left that you find yourself returning to the refrigerator for time and again, just throw it out. I say this of course with great compassion for those who might be suffering monetarily.

L-Glutamine, an amino acid can work wonders if you're experiencing cravings. 1000-1500 mg. 3x a day can keep the craving monster at bay. If you're really suffering, open a capsule under the tongue for and in about 3 minutes, your craving will disappear.

Get that turkey carcass into a pot and get your soup going! Remember, there is a fabulous bone broth recipe on the website for you to refer to. Grab your celery, onions and carrots as well as your favorite spices and start simmering!

You can jump right back on plan with the very next meal and my goal is to help you achieve that sometimes difficult task.

Never in history have we had access to such an abundance of food as we do today. I'm not even sure there's a pause between Halloween and Christmas and the junk food diving we do is perfectly acceptable.

We act like hummingbirds in need of that constant draw of sugar water to maintain our energy levels from an over stressed, under nourished world we live in today. Don't be that carbohydrate dependent person because it only guarantees "dis-ease".

No matter your "clean up" choice, don't allow it to manifest through the Christmas Holiday or you begin again in 2012 with that same old resolution we've all faced year after year and a mountain of guilt that can be paralyzing and self destructive.

The perfect diet to gain control of those cravings would be the Restricted Phase I plan.

Soya Vegetable Biryani | Soya Chunks Biryani Rice ~ Step by Step Recipe | Lunch Box Recipes

I remember Meal Maker from childhood, those soya chunks made frequent appearance in many of the dishes that Amma made. Those were the days when I was eating meat and remember the meal maker soya chunks being included in all vegetable biryanis and gravies. Since it tasted and looked very much like meat, it made a great impact on many of us. I am not sure why Amma stopped using this in her cooking.

It's been almost 20 years or more since I have last seen it being used in our home. Of course this time it was me who was cooking. I remembered this again after seeing my office cook using it in her famous Vegetable Biryani. She makes one awesome biryani and adding these soya chunks makes everybody assume it to be a non veg biryani and enjoy it even more.

Talking to hubby dear about protein and how important it is to include in our diet, when he was recently on a veg diet, he wanted me to get these soya chunks for him. After buying a packet of these soya chunks, I naturally wanted to see the different ways I can include. The first one would obviously be the vegetable rice. And that's what I made. Looking back, maybe I added more in my enthusiasm. Also I assumed my boys will not find out the difference but I was wrong. They knew it right away that it wasn't meat and wouldn't eat it. So in the end hubby dear ended up eating the major part of the soya.


Soya Vegetable Biryani 

Ingredients needed:

For the Soya Chunks

Soya - 1 cup
Water - 4 cups
Salt a pinch

For the Rice:

Short grain Rice / Basmati Rice - 1 cup
Onions, chopped as julinne - 1/2 cup
Tomatoes - 1 medium
Ginger Garlic paste - 1/2 tsp
Chilli powder - 3/4 tsp
Green Chilles - 4 nos
Mixed Vegetables, chopped - 1 cup (Carrot, Beans Potatoes)
Water - 1 & 3/4 cups
Salt to taste
Oil - 2 tsp
Ghee - 2 tsp
Mint Leaves - handful
Coriander leaves - handful
Coriander Leaves - for garnishing
Garam Masala - 1 pinch

Whole Spices

Bay Leaf - 1
Cinnamon - 1 inch
Cloves - 2
Cardomon - 1
Javatri -
Anise Star - 1

How to make Soya Chunk Biryani.

Take the soya in enough water and pressure cook for 1 whistle. Drain the water and keep the soya chunks aside. You may have to check if it's cooked or not. Else cook again.

For the Rice.

Clean and soak rice for 15 mins in water. Wash and prep the vegetables and keep it aside.

Heat the oil in a non-stick pan. Add all the whole spices. Saute well, then add the onions, Green Chillies. Sauté till the onions become brown in colour.

Then add ginger garlic paste. Fry for 1 min, then add the mint leaves, coriander leaves. After that add chopped tomatoes, salt, chilli powder, saute well till mushy.

Next goes the Vegetables, salt and chilli powder. Fry for 5 mins with lid covered.

Now add the drained soya chunks, saute well and simmer for 5 mins. Let the soya get mixed well with the masalas.

Once the soya looks done, add the water, bring to boil. When the water starts rolling, add drained rice and cover. Simmer till the cook is cooked well.

It takes about 10 - 15 mins for the rice and the vegetables to get cooked well. When it's almost done, add the ghee and cover again.

Keep it in the vessel for 5 to 10 mins, so that it gets settled down.

Serve with Onion raita.


Sending this to Dish it Out - Soy and Tomatoes hosted by Vardhini
Check out the Blogging Marathon page for the other Blogging Marathoners doing BM#10