Showing posts with label Cooking Basic. Show all posts

Sunday, December 25, 2011

How to Blanch Tomatoes | Prepping Tomatoes in Different ways


When I think of gravies made without tomatoes I really wonder how one can make gravies without tomatoes. For me onions and tomatoes are something that are mandatory for a gravy. When it comes to using tomatoes, there are couple of methods used to make the best use of it.

Sometime back when we make any kurma or even a simple curry, I simply used to chop it finely and add. These days when the boys not wanting to have the tomato skin in the gravy, I have resorted to making a puree and adding to the gravy. This makes sure that you have a thicker and more gravy.


Blanching Tomatoes:

When you want to blanch tomatoes, take ripe tomatoes, wash and keep it aside.

Bring to boil 1 -2 cups of water as required. When the water is boiling, make sharp slits on the tomatoes and add to the boiling water. Switch off the flame and keep it covered. This takes about 5 mins for the skin to loosen up.

Typical blanching would require the tomatoes immersed in hot water to be immediately immersed in cold water. But I have seen that it works just fine, if I leave it in hot water and cool and puree to use in gravy.

Remove the skin with a knife and allow to cool. Puree the tomatoes and use in the gravies.

Used in kurmas, gravies where you want more gravies.

Smoking the tomatoes:

Wash and pat dry the tomatoes. Using a fork, insert into the tomatoes. Show over flame and roll over the tomatoes so that the tomatoes get burnt. When the tomatoes are done all over, remove from the fork and allow it to cool. Remove the skin when the tomatoes cool.

This gives a wonderful tastes for foods like Paneer Tikka, Baigan ka barta etc.
Freezing Tomato Puree:

When you have excess tomatoes on hand, you can puree as many as you want either by blanching or my simply pulsing it and storing it in ice trays. Once the tomatoes are frozen you can break and store them in zip lock covers and use when required.

Check out the Blogging Marathon page for the other Blogging Marathoners doing BM# 11

Saturday, December 24, 2011

How to Freeze or Store Pre cooked food | How to Freeze Cutlet

One of the interesting aspect of cooking that I have been always interested in would be in storing and checking out how to use different techniques in cooking. Freezing and storing food in the right way would surely fall under that category.

Though to be frank, when all the hassles that's involved in prepping and storing food for later usage, I find cooking on daily basis was much easier for me. Still I wanted to experiment on that. That was the reason why I had the theme to have prepped food for later cooking. Though I wanted to take up that theme, I was not able to. So the next best was to see how one would store and use for later times.

One of that was making those vegetable cutlets and freezing them. Having these ready would make our job so easy when we have unexpected guests coming over and you can quickly fry these cutlets for a quick snack.

I made this and tried when I made the Vegetable Cutlets. Though I was able to store them only for a day as the demand for the cutlet was so much that they just disappeared the same day!


Follow the recipe and get all of them shaped and place them on a plate.
Get the outer dipping sauce ready and dip the cutlets into the mix and make sure it covers all over.
Get the bread crumbs ready and roll the dipped cutlets over the crumbs. Allow to dry for 10 to 15 mins.
Take a dry box, plastic sheet, grease with oil. Cover the bottom of the box with the plastic.
When the cutlets are dry, place them on the sheet and continue placing other cutlets. Make sure each has space and not crowded.

I had packed about three on each layer.

Cover with the lid and freeze. When you need to make them, simply take them out, I felt there was no need to thaw too. I deep fried these on low flame for initial 5 mins, then increased the flame to medium, making sure the cutlet is cooked all over.

Drain on kitchen towel.

Check out the Blogging Marathon page for the other Blogging Marathoners doing BM# 11

Friday, December 23, 2011

How to make Rusk | How To Make Bread Crumbs | Microwave Method

We are starting the second group in the Blogging Marathon edition 11. It's been one exciting week in the first part and hoping it will continue the same.

For the second week, I chose the Mix n Match theme wit Preps and Preserves with Bihari special dishes. I must say I have enjoyed making Thekua and so Bihari dishes are great to make and enjoy a new cuisine.

Coming to today's post it's all about making rusk and Bread crumbs at home. Rusk is great to simply eat and coming to bread crumbs, you will surely need it when you got to make cutlets and Tikkis.

Though normally one gets to making the bread crumbs from stale bread, it is advisable not to use a very stale bread. At the most it can be a day's old or best is to use fresh bread.

How to make Rusk:

Rusk is double baked bread. For this you can bake your own bread and again bake the baked bread or you can use store bought bread. Anything works fine.
 
If you like the sides as I do, simply microwave the slices for 1 min and the turn and again microwave for 1 min. Slices that are little thick needs a little longer, but the bread tends to get crispy after cooling down. So don't fear seeing that the bread is still soft after removing from microwave.


How to make Bread Crumbs:

As I said for the Rusk, stale bread is not usually advisable, though the best way to use one day old bread is to make it into crumbs for coating cutlets etc.

I basically make two ways of bread crumbs, one for binding, another for coating or breading.

When you need something to bind your food like cutlet, patties, or even ground meat, you can opt for potatoes or fresh bread crumbs. In such situations, you simply pulse the bread in your food processor or mixer and you get a fine crumb, though very soft to touch.

This helps in binding the food to be shallow fried or deep fried.

The other process that requires bread crumbs, is to coat or breading the food such as fish fingers, cutlet outer layer etc.

In this process you will need a crisp crumbs and for this you can microwave the bread and grind it to get small pieces.

Cutlets are dipped in eggs or all purpose flour and then pressed over crispy bread crumbs for an overall coating and then fried.

Sending this to Kavi, who is hosting my MEC this month and she is accepting all dishes made in microwave.


Check out the Blogging Marathon page for the other Blogging Marathoners doing BM# 11

Monday, November 21, 2011

How to Freeze Beans - Fresh Pigeon Pea / Toor Dal and store at home | Step by Step Pictures for Freezing Seeds

During the winter season we get many seasonal vegetables, peas, fresh lentils, that we enjoy in abundance. I remember last year thinking about the loads of cauliflowers that come to the market. This year a small cauliflower weighing may be about 150 gms or so costs about 18 Rs, which is very expensive. Still that's not going to stop us from enjoying the vegetables. 

Among these the fresh lentils make a big impact. We get those fresh toor dal, Hyacinth Beans. Hyacinth Beans. / Anapakaya which we remove the outer skin and call it Pithikina pappu. We make pithikina pappu kurma with it that makes an excellent side dish for Dosas.

The term "bean" originally referred to the seed of the broad bean, but was later expanded to include members of the genus Phaseolus, such as the common bean and the runner bean, and the related genus Vigna. The term is now applied generally to many other related plants such as soybeans, peas, lentils, chickpeas (garbanzos), vetches, and lupins.- Wiki

Last year we got so much of these Hyacinth Beans, that we froze for this year. We still have a batch of it left and we also got the fresh ones to the market.

Freezing the beans makes sure you have the beans for using the non seasonal times too. It is normally done by Blanching. Blanching is cooking technique in which food is briefly immersed in boiling water or fat. Vegetables such as green beans are often blanched in order to enhance their natural green color. Blanched vegetables are typically plunged into an ice water bath afterward to halt the cooking process.

Couple of books that I read about freezing advises about this blanching method for freezing.

If you want to see how the plant and seeds looks read this post from our farms.


Fresh toor dal pods
After removing from the outer layer.
Ice water ready to be used.
Boiling water ready to be immersed.
Wash and take the beans in a muslin cloth
Tie it properly with a rope.
When the water reaches boiling point, when it starts rolling stage, immerse the pack into the hot water.
Count for 2 minutes, and remove.
Plunge it immediately into the cold water.
Remove from the cloth
Take the beans in a colander and run it through running water.
Let it stand for 10 - 15 mins.
Dry the beans in a cloth under fan. Before packing the beans, make sure the beans are dry.
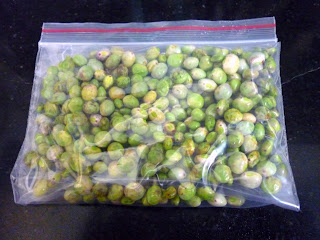
Store the beans in a zip lock cover and freeze.

My method is inspired by Chitvish of Induslady, Other interesting reads on storing and freezing, Divya's post on peas. Article on blanching Vegetables with details on timing.

Today is the last day of the BM # 10 Group 1, I took up the theme on Preps and Preserves.


Check out the Blogging Marathon page for the other Blogging Marathoners doing BM#10

Sunday, November 20, 2011

How to Store Curry Leaves? | Preserve Curry Leaves / Kadi Patta as powder | Step by Step Pictures

On Sunday we had our customary vegetable shopping done. I found huge load of curry leaves and wanted to make different podis, and also store them for everyday cooking. Storing Fresh Curry Leaves fresh is a task sometimes, but if you plan and clean it properly it can stay fresh for over a month. 
Sunday is mostly spent cleaning and prepping the vegetables. But it's worth the pains.

I store coriander leaves the similar way, though the second method used for curry leaves may not work for coriander leaves.


How to store Curry Leaves in Fridge fresh - Step by Step pictures

 Fresh batch from the market
Wash and rise in running water and let it drain in a colander.
After 30 mins, the water is almost drained.
 Dry the curry leaves on a towel under fan.
Warp around and make sure the leaves are very dry.
 Take a dry box, place a paper at the bottom. Remove all the leaves from the stem and drop into the box.
When you are done, cover with another paper and close with the lid and refrigerate. When required you can just use it without bothering to wash.

The other tips to Store Curry Leaves, the second way to store the curry leaves would be to make a powder of them fresh and store in an air tight container.

This can be simply done in a microwave for 3 - 4 mins depending on your microwave. The first time I did, I had to experiment. So I started with 30 secs, another 30 secs,1 mins, 2 mis. So looks like finally after 4 mins the curry leaves were crisp that you could just crush them in hand and store.

Once the curry leaves are dry, remove the leaves from stem, take them in a mw safe plate, mw for 30 secs
Then for another 2 mins, depending on your mw
 This is after 2.30 secs
This is the final powder that you get, it can be stored and used in sambar, gravies. Just add a small pinch for not altering the taste, yet including the goodness of curry leaves.

Can be used in takda of chutneys, dals etc.

Sending these quick basics made in Microwave to Vatsala, who is hosting this month's Microwave Easy Cooking Event.

Check out the Blogging Marathon page for the other Blogging Marathoners doing BM#10

Wednesday, November 16, 2011

How to store Coconut | Ready to use Coconut Paste, Grated Coconut | Indian Basics for Cooking

Today's post is about preserving fresh coconut in couple of ways. We use coconut in our cooking for most of the kurmas as a paste and grated form for the Stir fries. Since we get coconut for pooja, invariable about two coconuts are always available. We have seen that storing as such along with the shell makes the coconut to change colour and also very tough to remove and use.

I have already posted on Coconut paste which is always stored for making gravies. However as a ground coconut stored in the fridge will not be fresh. If the coconut is ground without adding any water and not touched, it mostly stays for a week or otherwise the shelf life is only about 2 -3 days. After seeing that so many coconuts are going wasted, plus the fact that in the rush hour it becomes extremely tough to grind, we thought we should freeze it in cubes for easy usage.

Then Athamma decided she could even grind poppy seeds along with the coconut to make it even better. So the cubes you see is actually poppy seeds ground along with coconut. When stored in individual cubes, while making the gravy we will simply take the required number of cubes and add to the gravy. There is no need to thaw or defrost. Simply add it directly to the gravy and simmer till the coconut loosen by itself.


How to freeze Coconut paste

Grind the fresh coconut as you will do for making the Coconut paste

If you want to add poppy seeds or any other masala, you can combine it along with the finely chopped coconut and ground.

Fill in the cubes tray with the paste and freeze. Once the paste is frozen, remove from try, break into individual pieces and store in a zip lock cover in the freezer. Use it in your gravies as required.


Next came the grated coconut.

Now not only was grated a pain, grating a small amount was a tough thing to do in the rush hours. Plus as I said we always had excess coconut on hand and never knew what to make with it. Making coconut barfi was the last resort. We also do that occasionally as kids like the barfis that Amma makes. But again this can't be done frequently.

So Athamma decided that only way of storing the excess coconut was getting it grated and freezing it. The grated frozen coconut stays white and fresh for many months. I haven't actually tested the shelf life but I know there is endless boxes of frozen grated coconut at home. I was so happy when my friend told me that this is a fantastic idea that helps her so much these days for her cooking. She uses grated coconut for all her dishes yet she was finding it difficult to grate everyday. She was overwhelmed knowing this way of preserving fresh grated coconut and said she is eternally thankful to Athamma for this tip.


How to make Fresh Coconut Milk
How to make Fresh Coconut Paste
Check out the Blogging Marathon page for the other Blogging Marathoners doing BM#10

Tuesday, November 15, 2011

How to prep / clean Snakegourd or Pudalankai

Days surely fly! It feels it's only yesterday when I thought I should start a marathon and here we are into the 10th edition. As you might know, we had a break in between, and we have a strong group of bloggers wanting to run this every month. I am very thankful to have them support every edition of Blogging Marathon.
 
As with every edition, the themes are carefully thought through to make it interesting and exciting. For the first week, I am doing Preps and Preserves. I was finally able to include this theme and wanting to do it, and also hoped others will take it. Looks like I am the only one to do it and I hope I do justice to the theme. I will be sharing some of the preps I follow in my cooking. It could be something that's everyday affair in most kitchens but I hope it will be a good tutorial for novice cooks.
 
Prepping vegetable has always been something that fell on me from a very long time. I have always been an assistant for Amma and used to prep all the vegetables for her. So much so that I learnt how and what vegetable should be cut in which fashion much before I actually got into cooking. I think it's very important to learn this before one actually does the final cooking part. I know I received lot of feedback on my post about cutting and using Onions in different ways.
 
I would love to hear your method of prepping if you follow a different method. First in the series is about cleaning Snake gourd. 
These snake gourds are the smaller variety that are available.  Trim the ends and wash well.
Cut in middle into equal parts.
Using a sharp knife, scrap on the top from top to bottom holding the snake gourd in your left hand.
This way would be prefect way.
Continue with the other pieces also.
Once done, holding the snake gourd straight slit in middle. If the vegetable is not tender, the inside part will not be edible.
Using a spoon, scoop the white soft part out.
Once done with all the pieces, wash well.
Depending on what you are going to make, chop them accordingly. If I make a Kootu, I chop them into small pieces. For stir fries, chop them into 3" pieces as above.
Once chopped, take them in a bowl, add salt and soak them for 10 mins. Before using the vegetable squeeze out the salted water and use the vegetable. Soaking in salted water removes the itchiness that might happen when consumed otherwise. 

I made Seru paruppu Pudalankai poriyal with the above.

Do share your method if you happen to prep this differently.

Check out the Blogging Marathon page for the other Blogging Marathoners doing BM#10