Tuesday, January 17, 2012

Eggless Chocolate Melting Moments | Melting Moments with Chocolate | Step by Step Recipe

After the brownie and fudge I thought I must make some cookies and was browsing some chocolate books that I have on hand. Then deciding that Internet must have some good eggless cookies, I landed in Joy of baking space to discover these melting moments. Then I realized that in recent times I have seen so many versions of this on many blogs. I liked the simple one that this recipe gave and I simply added cocoa to make it chocolate.

My boys refuse to eat anything that doesn't look like chocolate. On reading the description it is said that these melting moments are similar to yet another version of cookies called the Mexican wedding cakes. Both the cookies are round balls, dusted with confectioners sugar. And both are butter based that gives that melt in the mouth taste. The only difference between the both is that ground nuts are used in Mexican Wedding Cakes, while cornstarch is used in melting moments...how delicious. My next venture will surely be Mexican wedding cake, or maybe I have already made it without knowing the name.


We were off to our sis-in-laws place for pongal and just came back. I baked a huge batch of four different cookies for them. Everybody loved and were so amazed that those were homemade. These melt in the mouth cookies were so much of a hit and my kids loved it. Especially the sugar dusted on the top made these so delicious to munch on.


Eggless Chocolate Melting Moments Recipe

Ingredients Needed:

All purpose flour / Maida - 1 cup
Cornstarch / Cornflour - 1/2 cup
Powdered Sugar / Icing Sugar - 3/4 cup
Butter - 3/4 cup(in room temperature)
Cocoa powder - 2 tsps
Icing Sugar for dusting - 2 tbsp

How to bake Melting Moments:

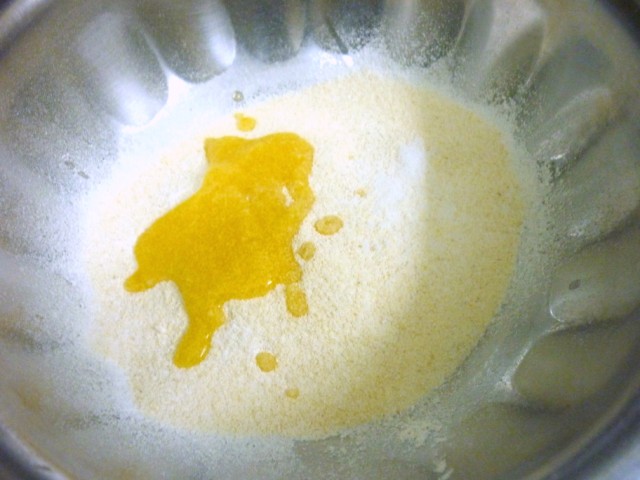
In a bowl, sieve the flour cornflour and cocoa powder together. In another bowl, cream the sugar and butter together well till it becomes soft and fluffy. Then add the flour the butter slowly and mix well. The dough will be soft and easy to handle.

Pre heat the oven at 185 Deg C, grease a baking tray and drop in balls of the dough on the greased tray.

Bake the cookies at 185 C for 15 mins. Once done check and make sure it's cooked. Bake for another 5 mins and allow to cool. Sometimes it may take another 10 more minutes.

Let it cool completely before removing from the tray and dusting with some icing sugar.

Once it's cooled the sugar gets into the cookies and you get that soft melt in the mouth taste.


Sending this to:
Kavi, who is guest hosting Kid's Delight themed on Something Sweet

and my own Chocolate Mela


Check out the Blogging Marathon page for the other Blogging Marathoners doing BM# 12

Monday, January 16, 2012

Eggless Microwave Brownie with Nutella | Chocolate Recipes | Step by Step Recipe

When it comes to cakes or muffins, my kids love only chocolate base. It's such a thing that they will not even touch if it's not chocolate. I have made many versions of easy and quick Microwave Mug Cakes. These are so quick to make that you can for your kids in a jiffy.

For the second day I thought of making another version of 1 minute Eggless Cake in Microwave. This is inspired from so many other bookmarked recipes. The recent one that I loved was from Vardhini, who was inspired from Pages, who had originally adapted from Mons Chocolate Mug Cake. See how much a chocolate can pass on! For the all the chocolate lovers out there, this is a beautiful recipe. Thank you ladies..:) I have further tweaked to suit my own taste.

I made this along with the Chocolate Fudge, since it was taking time to set I thought I will make a cake meanwhile to pacify my boys. The moment I made this, it disappeared and there was more demands for more to be made. This was made again right away and that kind of set things alright.

This is surely another version that I am going to be making quite often.


Ingredients Needed:

All purpose flour / Maida - 2 tbsp
Icing Sugar - 3 tbsp
Cocoa powder -  3/4 tbsp
Baking powder -  1/2 tsp
Baking soda  a pinch
Curds/ Yogurt - 1 & 1/2 tbsp
Milk- 1 & 1/2 tbsp
Olive Oil- 1 & 1/2 tbsp
Nutella  1 tbsp

How to make Eggless Microwave Brownie

In a mixing bowl, shift the flour with baking soda, icing, cocoa powder, baking powder and baking soda.

Next add yogurt, milk, oil. And finally add the nutella. Mix well.

Microwave this mixture in a microwave safe bowl.

Microwave for 1 minute, then followed by 30 secs. Let it stand for 30 secs if you feel.
.
Notes:
Since this rises while cooking, use either a tall cup or a bowl.
Serving Suggestions: Dazzle some chocolate syrup over it and serve warm

Sending this to:
Kavi, who is guest hosting Kid's Delight themed on Something Sweet
Kalyani who is hosting MEC, for the January Edition
and my own Chocolate Mela

Check out the Blogging Marathon page for the other Blogging Marathoners doing BM# 12

Sunday, January 15, 2012

Easy Fudge Recipe | How to make Fudge in Microwave | Chocolate Fudge with Condensed Milk ~ Step by Step Recipe

When I decided on the Blogging Marathon this month, it never struck me that we are going out of town during the Pongal holidays and that I might not be exactly at my desk to check it out. Once I was over my apprehension on that fact, I decided I should at least make these chocolate dishes ready ahead so that I can plan well. Athamma left for her home town a week ahead of us. The day being a Sunday, I decided to make my chocolate dishes in the evening.

First was this simple Fudge recipe where I used only the Semi Sweet Chocolate chunks with Condensed Milk. This is such a quick dish to make, though if you really want to eat it as a fudge you got to wait for at least an hour for it to get solid.  Chinnu was restless and eat it much earlier and loved it every bit. I literally had to hide it for clicking some pictures. Then again I am always in a rush that my pictures these days are so hurried.

Today we are starting the 12th Edition of Blogging Marathon, and I decided on making Chocolates. Since I have Chocolate Mela going on, what other way to enjoy mine and my kid's favorite. So for the next seven days I will be sharing my most liked chocolate recipes.
There is no dearth of chocolate recipes that I have filed up to try. However inspiration for this comes from a glance at one of the cooking show that comes in Chutti TV that runs non stop at my place. I must have seen this recipe couple of times but both the times I was just passing by and I noticed chocolate chip and condensed milk was used. Since I wasn't up to using up my stock of chocolate chips, I thought I should make use of the cooking chocolate slabs that I have with me. I was just going on a hunch to make this and knew however it turns out, I will still have takers for chocolate at home.

Just as thought, my kids loved it. The fudge looked best, in the actual Fudge like after two days, when I tried my best to save up the stock and not let the kids complete it right then. Make very small pieces and stock, use very sparingly as it's highly addictive and you can't just stop with one!


Step by Step Picture Recipe


This is a super quick method to make Chocolate Fudge in Microwave.

Ingredients Needed:

Semi Sweet Chocolates - 1 cup
Condensed Milk - 1/4 cup

How make quick and easy Chocolate Fudge:

In a microwave safe bowl, take the semi sweets chocolate chunks and nuke for a min. Remove and whisk for couple of times. Then again put it back for 30 secs.

Depending on your microwave you may need to micro for another 30 secs. But be very cautious to confirm the chocolate is melted is not getting burnt.

Remove and whisk again for a smooth texture.

Add condensed milk and microwave for 1 min 30 secs. Whisk well to get a smooth sauce.

Prep a plate and cover with aluminum foil. Grease with butter/ ghee.  Pour the chocolate sauce over the prepped plate and refrigerate for at least an hour. Cube into smaller pieces and indulge in this sinful temptations.

While I was making it Konda was restless to taste. When she did, she said it tastes so much like cadburys' dairy milk chocolate. And couldn't wait to eat it. I always think the best compliment she gives is when she says she wants to take it for her friends.


Sending this to:
Kavi, who is guest hosting Kid's Delight themed on Something Sweet
Kalyani who is hosting MEC, for the January Edition
and my own Chocolate Mela

Check out the Blogging Marathon page for the other Blogging Marathoners doing BM# 12

Saturday, January 14, 2012

Pathir Pheni ~ Karnataka Special | How to make Pathir Peni / Chiroti Step By Step Recipe | Indian Cooking Challenge for December

For this month's Indian Cooking Challenge, I was still undecided when the thought struck me that I could travel south this month. I was waiting to catch someone online to get them refer some recipe and just then Harini came online. So I immediately pinged her to share some recipe that she learnt from her Mom. She said her granny has been after her to make these Pheni.

Since I had to cite the state of origin, I pinged her again to verify and she this recipe could very well originated from Karnataka, as Harini says that her my grandma has origins from Bellary and could have come from that part of her heritage. However I have read about this recipe in Meenakshi Amma's Cook and See book. So this might have been a common sweet among the south states. As this is also called as chiroti.

Then I searched Pheni as a single word brings up something else. This recipe is called Pathir Pheni.

I want to begin the new year with a sweet tone!
I was discussing this with Amma. Just around the first weekend of every month I would discuss the ICC recipe with both Amma and Athamma. I mostly expect them to come out with some thought processes for me to proceed further. During Deepavali, Amma was mentioning that she got Chiroti Rava by mistake for making Rava Laddos and they simply won't hold their shape. So when I was saying that these Pathir Peni were also referred as Chirotis, she assumed that I would get that Chiroti rava for making. 

I completely forgot that Harini had updated that if we should use the Chiroti rava if using Rava. I tried it out on a Sunday and let it resting for more than 2 hours. The dough was so stiff after the stipulated hour. I had to add more water and knead again to get a soft dough. Covered it again and forgot about it for almost more than an hour, as I was busy baking chocolate cakes for the kids.

It was such an exerting day and I sent across Amma's share. Since it was made at late night, I completely forgot to get Hubby dear taste this. So it was so funny when he got to taste this at Amma's place and asked from which shop she got it. Naturally you can imagine what that feedback means. I was really happy that though what started as tough, ended up so well!.

I would really want to thank Harini for sharing her granny's recipe for us to enjoy!

Pathir Pheni / Chiroti

How to Make Pathir Pheni Step by Step Picture
Measure 1 cup of rava, since I was using the regular rava, I tried running it in a mixer, still it was very grainy.
Add ghee
Crumble well together
Slowly add water and knead to a soft dough.
Cover with a wet muslin cloth and let it rest for at least an hour. I left it for more than 2 hrs because I used regular rava.
After 1 & 1/2 hours
Rice flour and ghee paste.
Knead well before rolling out.
Pinch out into small balls numbering to 5.
Keep them aside
Spread the paste on one side of the rolled out discs.
Place one over the other on a pile.
Pat well
Continue on the top also
Start folding from the end next to you towards opposite side.
Fold completely till you reach the end.
You will get a roll like the above. Roll again so that the layers stick to each other.
Cut into 1 inch pieces.
Gently press over the top of each piece. Keep them all ready for deep frying.
Second method of rolling in the sheets.
In the second method of folding, you can leave some space from the first disc and continue like the above.
In the end, roll very tightly again and pat on the sides. This method gave me a very even ends
Once the oil is hot, deep fry on both sides.
All fried and ready to be sprinkled with icing sugar/ powdered sugar!

Pathir Pheni | Chiroti

Ingredients Needed

For the dough

Pheni Rava / Fine semolina / Chiroti Rava - 1 cup 
Ghee 2 tsp
Water to knead the dough
Salt a pinch
Oil for Deep frying 

For the Rice Paste:

Rice Flour 2 tsp
Ghee 2 tsp

How to make Pathir Pheni

In a wide bowl, add the rava, salt ghee (in solid form) and crumble well. Then slowly add water and knead to a soft dough.
Note that the dough needs to be softer than the regular chapati/puri dough.
Cover with a muslin cloth and set aside for a minimum of 1 hour. The more the resting time the better the quality of the phenis.

In a smaller bowl, whisk the solid ghee and rice flour until they form a smooth paste.

Check in between and knead again to get a soft dough. 

Knead again and pinch out 5 balls of the dough and roll out thin puris out of each of those and cover them until later. 

On each rolled out puri, apply the rice flour-ghee paste and layer them one on top of another. Here the number of puris used for layering are 5. Use less or more depending on your preference keeping the minimum to atleast 3 puris.

Roll the layered puris into a tight log. Keep applying the rice flour-ghee paste as you keep rolling as well. Tuck the ends securely. 

Cut the log into 1 inch pieces and roll out each piece into a thin puri and keep them covered until ready to be fried.

Meanwhile, heat oil on low-medium flame. Fry each of the puris taking care that they don't change color. 

Drain on kitchen towel and sprinkle fine sugar over the top.

Notes

Since the rava I used was the regular one, I tried grinding it but it was of no use. So I kneaded as such. So it took me almost 2 + hrs for the dough to be soft. 

Still if you are not able to find Chiroti rava and could grind the regular rava, you can go ahead. grind the normal rava and sieve to get a finer consistency)

Traditionally Ghee is used for frying. But regular cooking oil is also fine.

I suppose it's important to make sure the color of the puris remain as white as possible.

And Harini also says these can be stored in an air tight containers upon cooling.

Serving suggestion - Sprinkle powdered sugar and serve it along with Badam (Almond) milk.
Optionally they are dunked in sugar syrup and served as is.

I got about 10 puris exactly, making sure all are of equal size. we found the powdered sugar on top tasted great. I can imagine how the sugar dunked ones might taste.

This is yet another traditional recipe that came out well.

To all my ICC members, please link your Pathir Pheni post to Mr. Linky.